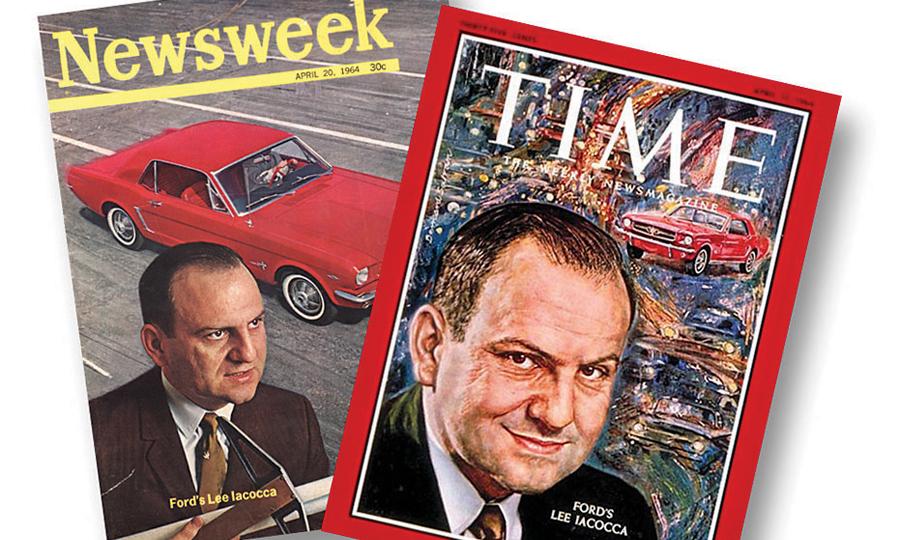
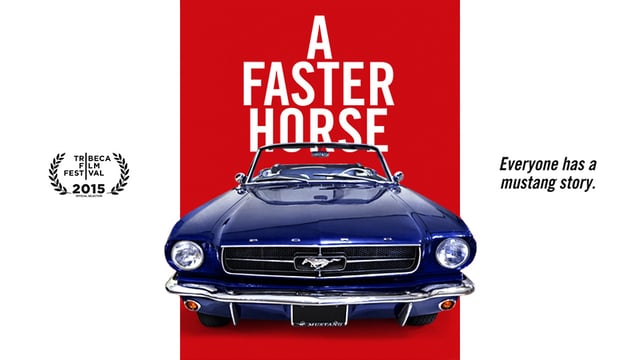
I was never planning on diving deep into the history of Lee Iacocca, but after reviewing “A Faster Horse”– a documentary surrounding the creation of the 6th generation Mustang on Netflix – the film stirred up a name I hadn’t heard in years: “Lee Iacocca.” – This mysterious, legendary, near mythical name, was thrown around a lot when I was a kid.
Tune in everywhere you stream, download or listen!
But who was this masked man? – Not knowing any better I always put Lee up there with Perot, Kissinger, Rockefeller and others as “some old business dude” – pretty generic and never really knowing what people were truly on about. Later – admittedly still not knowing much – I came to realize one thing to be true: like John Z. DeLorean, Iacocca was a icon, and a car-guy. In October, as fate would have it, I stumbled across this 34 year old tome. A well kept copy of Iacocca’s autobiography was hiding along the shelves at a vintage store. And, for the low-low price of $1.00, why not grab it?
After a few days of light reading…
Every great story has a beginning, and most recounts of a person’s life all start about the same: “It was never easy for me. I was born a poor black child. I remember the days, sittin’ on the porch with my family, singin’ and dancin’ down in Mississippi…” — Steve Martin as Navin R. Johnson in “The Jerk” – 1979.
So you can imagine how this goes: Iacocca – born and raised by Italian immigrants in Pennsylvania, does some schooling and ends up working for Ford in the late 1940s. #micdrop.
Saving time, I’ll also condense Iacocca’s early years for you: after getting his mechanical engineering degree at Lehigh University and being recruited by Ford Motor Company, he and 50 other new engineers were in a year long rotational program exposing them to all aspects of how Ford operated internally. After graduating from that program, he and a few others decided they much preferred to be in sales. Iacocca knew that if he stayed in the shadows at Ford (and he may very well have designed some cool feature, part, or even a car) he would be stuck where he was. His ambition, and maybe ego, drove him to seek higher ground – out in front of the customer.
Even today, there is no formal training for sales people. They say “people are just born with it” – whatever that means – but like most people that want to move ahead, quickly, sales is the place to earn or burn. If you under promise and over deliver, management is happy and the recognition and opportunities are lavish. So, why is Lee’s story important to the automotive industry let alone motorsport?
>> Fast forward to 1961
Iacocca has steadily moved up the ranks. The overall impression depicted of Ford at the time was that the company had plateaued and lost touch with the changing market climate. The cars had become lack-luster and unattractive, most notably with the introduction of the bargain basement Ford Falcon some years earlier. By this point, Iacocca was what by today’s standards would be called a “business unit manager” and he was leading a clandestine tiger-team of engineers to develop a car that would reignite interest in the Ford brand, especially after the Edsel fiasco. In Iacocca’s opinion it was better to seek forgiveness from the upper management than beg for their permission. “Project Cougar” (the original name for the Mustang), was underway.
Iacocca is often credited as “the father of the Mustang” and as the project lead, some of that is probably true. But then credit is also given to Joe Oros, the design studio head. However, through an internal competition, Dave Ash is the engineer that put pen to paper and created the Mustang design that won over 6 other submissions. In what was typical cost cutting measures of the times, the original Mustang was built on top of a slightly modified Falcon chassis. The price point was right, the timing was right, and the Mustang took the world by storm. In retrospect, Iacocca didn’t become famous inside of Ford because of the car, but because of the sales numbers it drew: the Mustang sold 418,812 cars in its first year at a price point of $2,368 – that’s just shy of 1 billion (with a B) in gross sales – in 1965 dollars. The adage in sales is “you’re only as good as your last 2 quarters” , and Iacocca had definitely locked in his future for the next few years.
Held in some regard as a “fixer” , Iacocca was moved to the Lincoln-Mercury division. He had repeat success for the dying brand by pushing the new Cougar (based on the ‘stang) and Mark-III (based on the t-bird) to debut riding the coattails of the Mustang hype. After his “three-peat” of successes, Iacocca was eventually moved into the position of President of Ford Motor Company, making him Henry Ford II’s right hand man. Timing always seemed to be on Iacocca’s side, at least according to the picture painted in the book. For example, he dodged a bullet when interim Ford President Semon “Bunkie” Knudsen undid “the mustang mania” by making it bigger, wider, heavier, and more costly. Sales plummeted. Iacocca would also see success in Europe with the launch of the Fiesta during the oil crisis. The Fiesta was a name – that until recently – had all but disappeared from the Automotive landscape.
>>>> Fast Forward again, to 1979
Sparing you the details, Iacocca is “forced to resign” from Ford Motor Company and takes the helm of a nearly dead Chrysler Corporation a few months later. Successes with the “K cars” (the Aries being the most famous), front engine front wheel drive vehicles, boosted sales during a tough economic downturn in the early ’80s. Along with the debut of the “Dodge Caravan” – the first real “people mover” in the US that appealed to the masses in the same way the VW Type-2 “micro Bus” did in the ’60s – helped return Chrysler from the grave. Pushing to acquire AMC for their “Jeep” line was another bold and prosperous move for Chrysler under Iacocca’s tenure. It really seemed as though Iacocca had some sort of Midas touch, but in his book, he’s quite humble about all the vehicle successes and places more of the credit on managerial, organizational and cost cutting procedures he implemented inside the companies. At Chrysler, he was also very fortunate to be able to recruit from his network of former coworkers, who were also dismissed from Ford, to help right the ship.
I feel that the reconstruction period at Chrysler during Iacocca’s tenure can be easily summarized by this parody (below) about Dodge Aries owners. Take a look.
So what does this all have to do with Motorsport… two very important things: 1). Had it not been for Iacocca’s determination to prove Henry Ford II wrong about the need for a 2+2 sports car in the mid ’60s, the Mustang would never have been born. The Ford Motorsports program took on a whole new direction as popularity with the Mustang grew. Ford could now leverage another vehicle, more importantly a production vehicle, instead of something highly specialized like the GT-40 in their racing endeavors. It also gave the weekend warrior a car he could easily access, modify and take to the track.
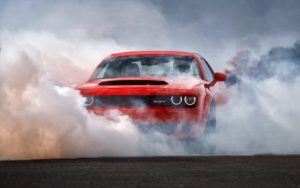
2). Iacocca had the vision to re-partner with Carrol Shelby (as he had in the past at Ford) to green light “Project Viper” in the late ’80s. Under Iacocca’s tenure we saw the first Viper hit the streets in late 1992, and like the Mustang in ’64, it was something new, something special, something unforgettable. The Vipers development – housed in a separate facility with only 50 people assigned to it – also gave birth to the “SRT” division whose badge still graces many high performance Chrysler products today.
Both the Mustangs and the Vipers have had great racing careers, are both highly sought after, and continue to turn heads today. Had it not been for Iacocca’s vision to green light these programs and his love of all things automobiles, I believe the motorsports (and the automotive) landscape would look very different today. Can you imagine a world without the Mustang? or the Mini-van?
Unfortunately, many of the vehicles Chrysler produced during it’s resurrection aren’t something held in high regard as collectors items and even on a recent trip to GTM Sponsor: CHAZ’s Used Auto Parts, I counted four Iacocca-era Chryslers stacked together (below from left to right: the LeBaron, New Yorker, Omni and Shadow). But these cars – describe them however you like – were some of the cars that kept Chrysler from going under.
I learned a lot from this book and it hit close-to-home in many ways. I was able to expand my knowledge not just about the inner workings of the automotive industry, but also about being an effective manager. What it takes to be a “charismatic leader,” and also navigating through the turbulent world of sales. The book holds many pearls of wisdom that are still relevant today.
Looking back, Iacocca is often regarded as a titan of industry and a hero. Though I am doubtful that Mr. Iacocca – at 94 years old at the time of this article – will be reading this review, I will tip my hat to him just the same. With utmost respect and sincerest sentiment – on behalf of the folks at GTM HQ … Thank You, Lee.
“A Faster Horse” is a documentary available on Netflix that takes viewers behind the scenes into the stressful and artistic world of car design. Never before were cameras allowed into the inner design rooms at the Dearborn, Michigan Ford facility where all the Mustangs have been created since the very first one. This inside look takes us through the evolution of the Mustang. The piece sets up as a retrospective for the Mustangs 50th birthday, but also focuses on the 2009 automotive downturn in the US.
After watching the film, I definitely came to a new understanding of Mustang history and its engineering. Despite all the outside pressures, in 2014 – Ford made a crucial jump and decided it was time to redesign their crown jewel – from the ground up. But for me, one of my biggest misconceptions around the Mustang was the number of “redesigns” there have been. The Ford team explains that there have only been 6 generations (including the current platform) put into production. The year-to-year changes, especially in the early generations were just face lifts on the same platform.
1962-63 (prototypes)
1964-1973; Gen 1
1974-78; Gen 2
1979-93; Gen 3
1994-2004; Gen 4
2005-2014; Gen 5
and 2015+ (current); Gen 6
I was also surprised to find out that more than 9-million Mustangs have been sold in over 50 years; and for a two-door sports car, that’s is a respectable metric.
The film does a great job and blending in archived footage from Fords history including interviews with Lee Iacocca, Carol Shelby and Henry Ford II. But more importantly it sets up interviews with key designers and engineers who have worked on the Mustang line through its 50 year run, including the original designers.
Watching the teams work on the 2015+ platform was insightful and educational. Some of their arguments and outcomes during meetings and in testing were enlightening. It was great to see this process from an insider view and shed new light on how cars are built today. For me, it answered some looming engineering questions … especially those I’ve always expressed – usually in frustration: “if only they’d spent an extra 10-cents!!!” — If you’d like to learn more about Automotive Engineering and the Mustangs journey, be sure to check out this film. Enjoy!
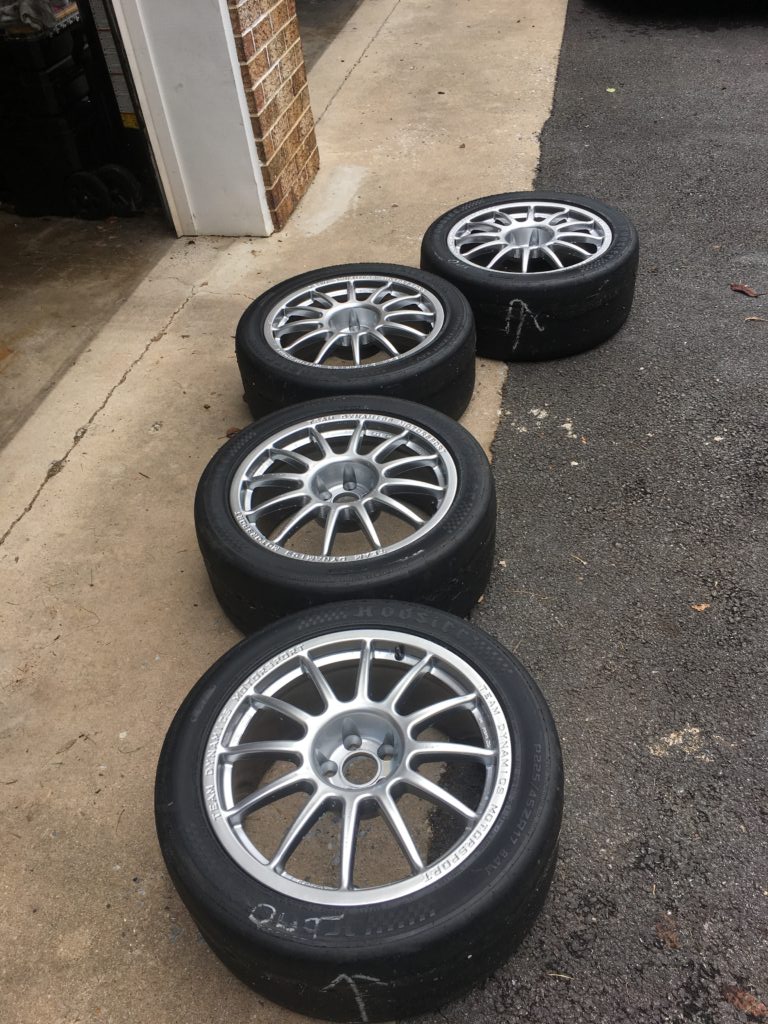
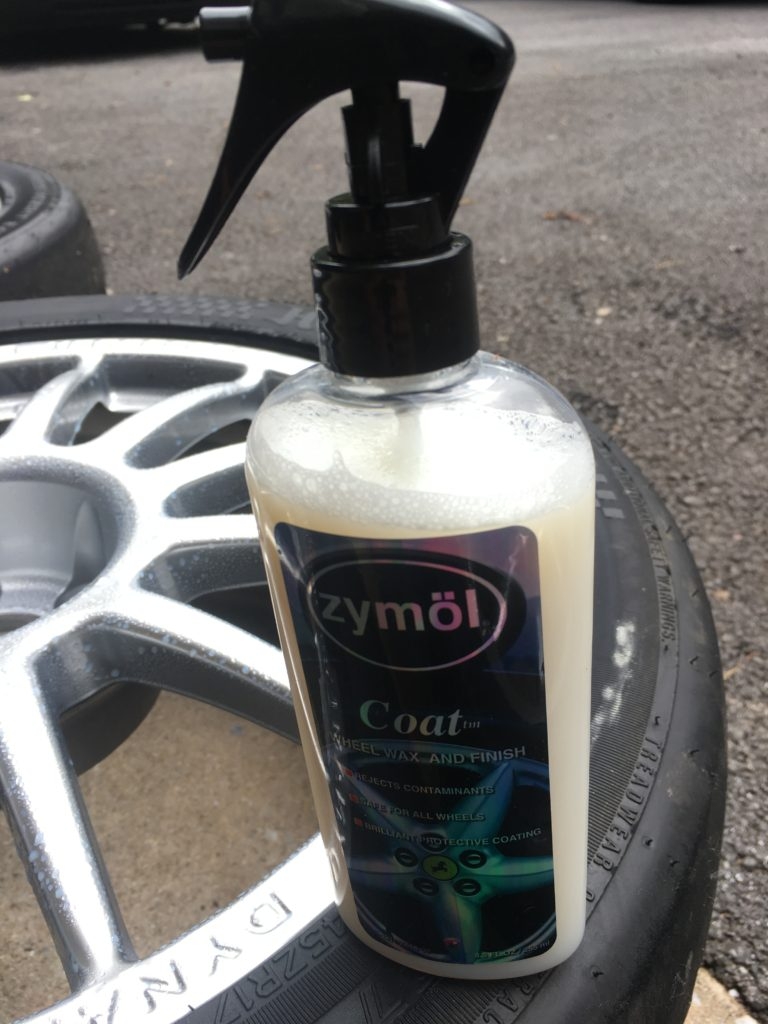
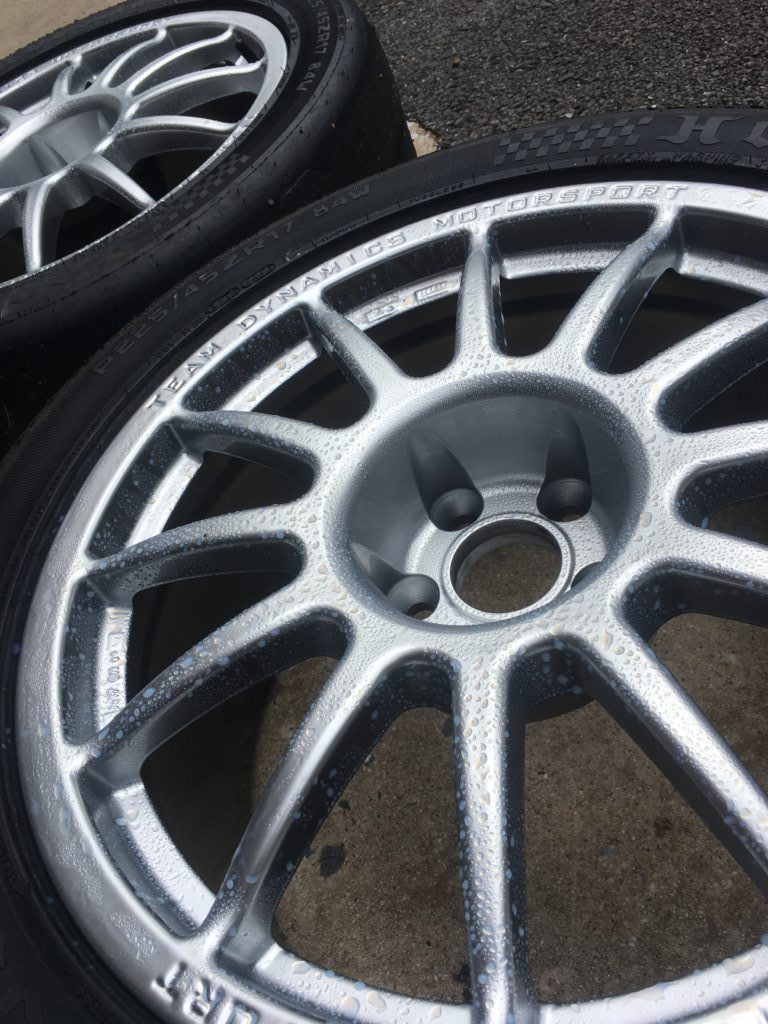
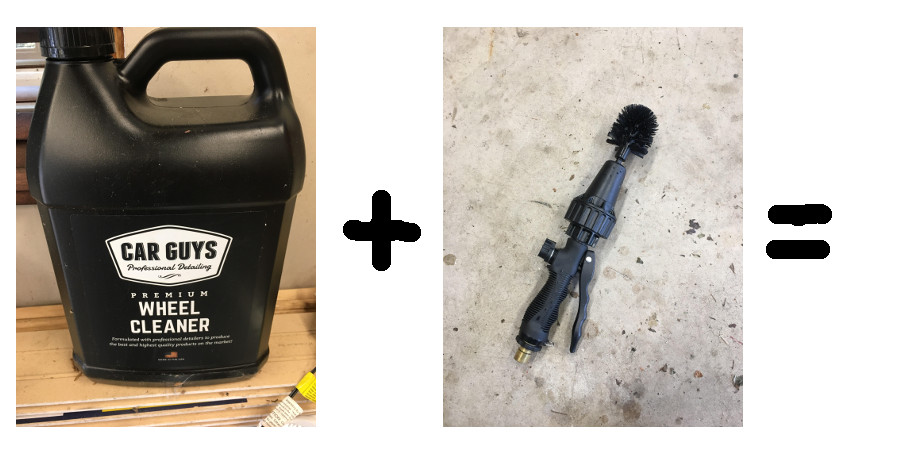
Back in April, I wrote about techniques for taking care of your Track Rims. After some serious rounds of fighting with the dirt, grime and brake dust that afflicts my white wheels, I continued to do research on chemicals and techniques for keeping my wheel investments tip-top. An older, and maybe lesser known, product is Zymol’s “Coat” – marketed as a protective “wheel wax.” It is made from natural ingredients including things like “spearmint oil” and claims to repel brake dust and other road grime.
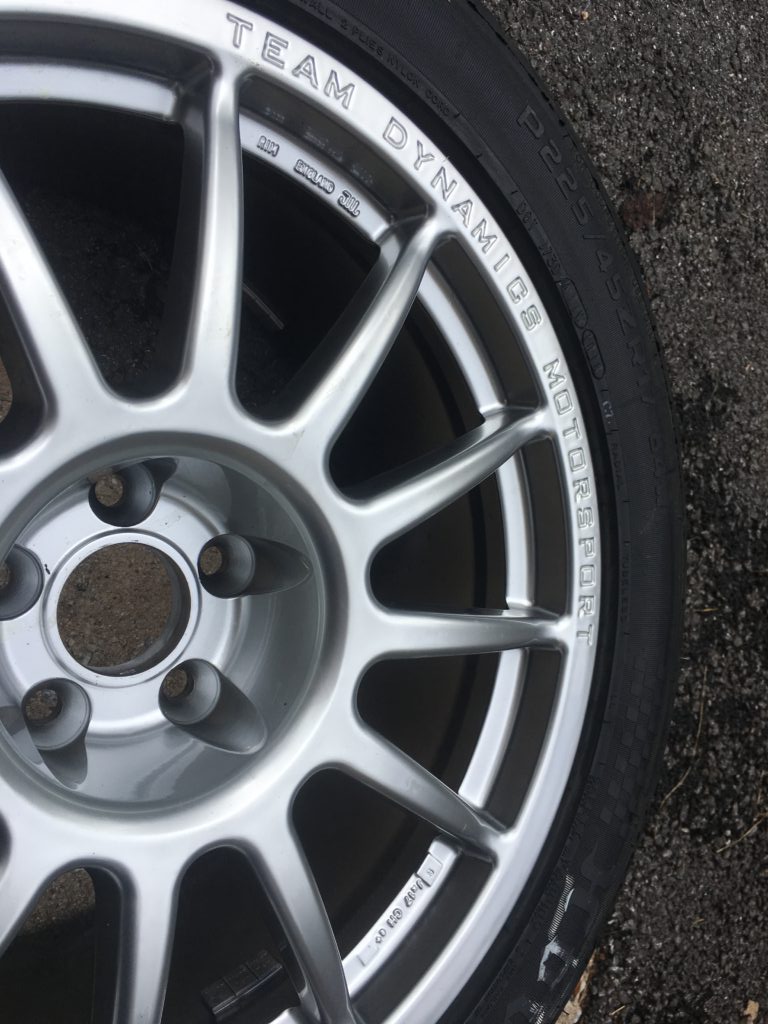
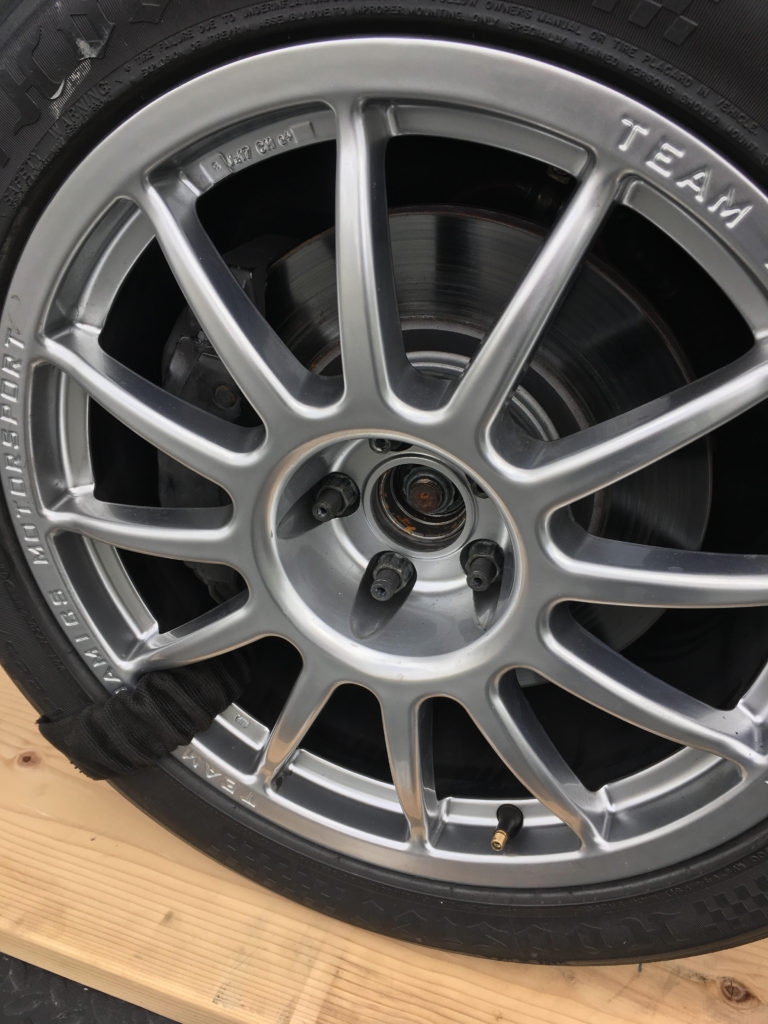
I recently received a brand-new “fresh from the factory” set of Team Dynamics wheels (above). These are a painted silver finish and look great. Despite my wheels being new, I followed the directions and quickly washed the wheels.
Shake well and spray down the wheels giving them a nice thick coating of the liquid wax.
Allow the solution to dry for about 20-30 minutes. Once the drying process is complete you’ll notice most of the solution has evaporated and a small amount of what looks like “blueish water spots” remains on the surface. Zymol recommends you give the wheels a quick buff with a terry cloth to smooth out the finish. (much like waxing a car).
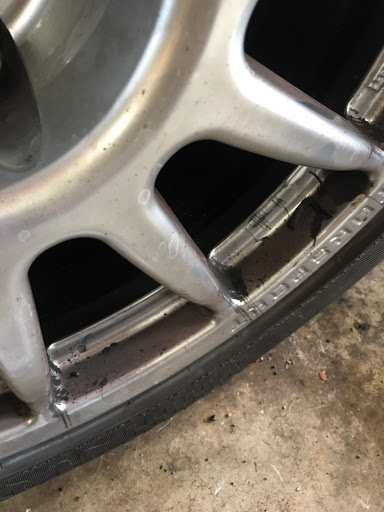
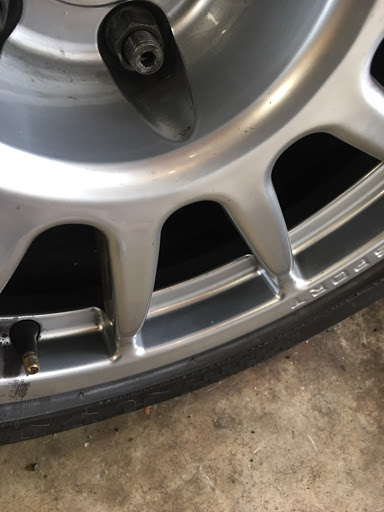
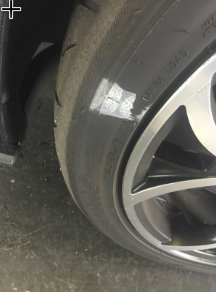
Next step – mount on your car, go to the track and HAVE SOME FUN! My first test was probably one of the best conditions I could have hoped for: 3-days at Watkins Glen with mixed weather conditions. Rain is always the worst enemy causing the brake dust to quickly adhere to the wheels and rust.
As you can see in the picture above, the wheel is covered in a fine layer of dust and track grime. Zymol’s claim is all you need is a light wipe with a terry cloth and everything should come off the wheels. Hmm...
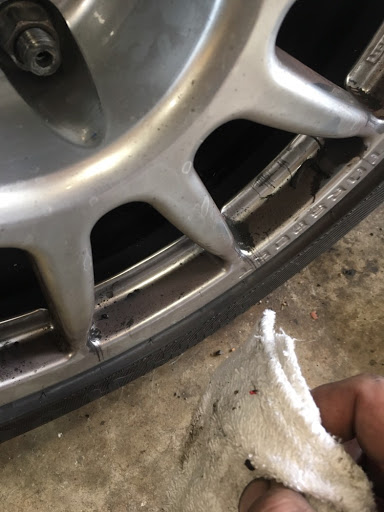
Terry cloth in hand… let’s do this. #sendit
I did my best to photograph, before/after in the same spot so you could easily see the differences. You can see the remaining grime around the valve stem and wheel hub where I purposely didn’t wipe. The results were better than I expected! – Zymol’s “Coat” really does do what it claims. There was little effort to remove even the most caked on grime, and the wheel had very little clag as well. Despite the cost ($26 for 8 oz – available on Amazon), I am very happy with the results, and plan to use this not only on my race wheels but also on my daily drivers. #knowingishalfthebattle.
Live Demonstration!
…And after 5 on-track days of brake dust abuse,
… an almost “like new” result after a proper cleaning (below). Note: I also reapplied the Zymol Coat for good measure once I was done! 🙂
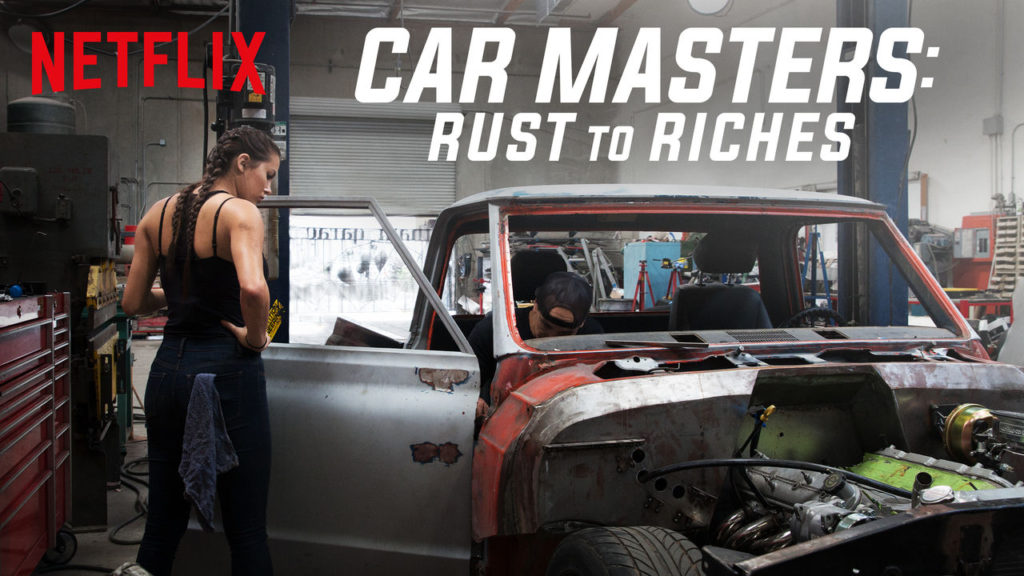
I am not generally one to fall prey to watching a reality television show. I just don’t like them. The drama is often contrived and the the flow of time is manipulated to create artificial stress. Not to mention the casts are generally an insufferable motley crew that make you want to throw things at the screen. Lately I’ve been on a tear of reviewing “motorsports related” programming that is available on streaming services and I stopped for a moment to watch the trailer for Netflix’s premiere season of “Car Masters: Rust to Riches.”
What really hooked me was the opening of Season 1 where the premise of the show is clearly explained. The idea is to mimic the “red paper clip – trade up” many of us might remember from a few years ago. Whereby a young man wanted to see how far he could take “the barter system” and see if he could find a way to start with a simple object (a red paper clip) and continue to trade/barter until he ended up with a house.
Tune in everywhere you stream, download or listen!
**[editors note] Looking for Car Masters: Season-2 review?, click here.
Welcome to Gotham Garage!
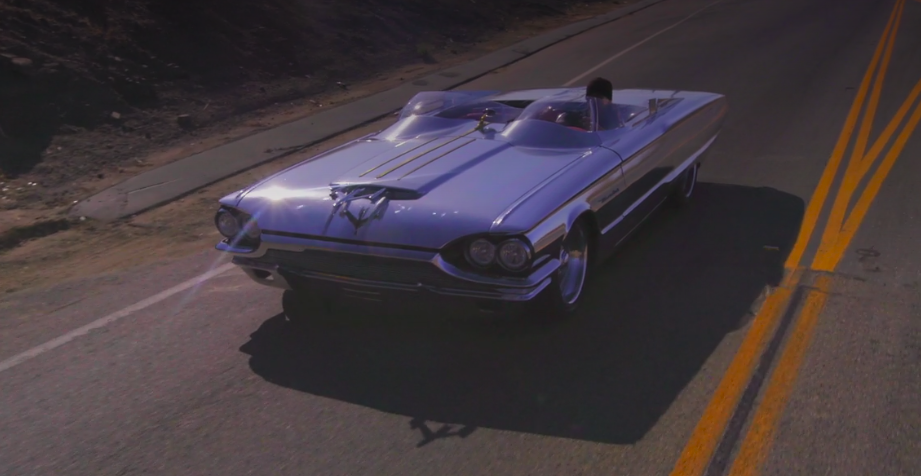
The Temecula, California based Gotham Garage’s new business venture was quite similar, start with a $1000 vehicle and build something worth trading for another vehicle, build, repeat, until finally having a vehicle worth $100k+ dollars – or what they refer to as “the 6 figure pay day.” Gotham Garage and its owner Mark Towle are no strangers to building custom cars and there are even other shows about their work. The show follows the journey of the Gotham Garage team for the better part of a year. They are a small crew: Mark (owner, lead designer), Shawn (the wheeler-dealer), Tony (the machinist), Caveman (the mechanic) and Constance (the engine builder).
From the first car they build – a 1964 Ford Thunderbird “rocket car” (above) to the last – an authentic 1955 Lincoln Futura replica (below); the show keeps you engaged the whole time. Some builds are split up across multiple episodes leaving you with a tinge of “cliffhanger” moments, but not really… let’s face it, I’m binge-ing this so it’s easy to plow through a few 30 minute episodes. It’s definitely not “couples cuddling time” programming, but my wife was able to watch with me and found the build process interesting and the results of the work impressive. From a “non-car-person” perspective, I think that speaks volumes.
Overall “Car Masters: Rust to Riches” doesn’t have the typical drama of a reality program but more of a documentary format with moments reminiscent of “the Office” and its breakaway monologues. The result is a lot of long hours dutifully recorded and compressed for the audience. Whatever was left on the cutting room floor during production doesn’t seem to matter, it probably would have taken away from the builds. The candid and simple nature of the format showcases some really creative, innovative and unique design and engineering work. For me, some of the work that Tony and Caveman were able to accomplish was incredible, and made me want to continue watching to see how they might tackle the next issue or set of requirements. I was pleased to see that the team gets along well personally and work together flawlessly, which made the viewing experience even better compared to other shows in this genre.
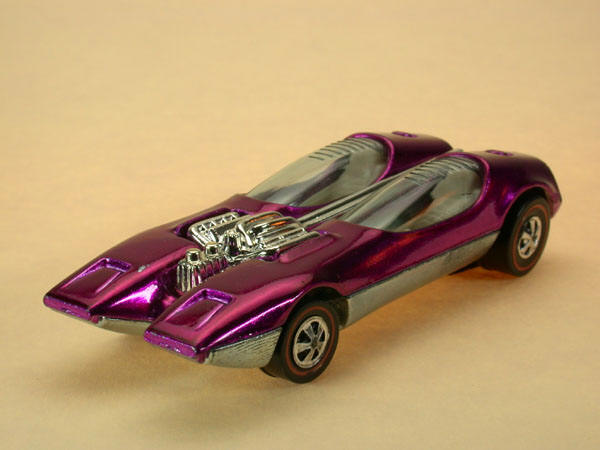
Splittin’ Image
Aside from the Futura (which you might also recognize as the 1960’s Batmobile), I would say the second most complicated build the team took on was a scale replica of the famed 1968 Hot-wheels “Splittin’-Image” toy (pictured above). I actually had one of these – in dark blue – as a “hand me down” so I was intrigued to see how they might scale up the toy. The team based their replica on top of a ’87 Corvette (C4) which by calculations had the same scaled-up wheelbase as the toy and nailed all the aspects and details of this concept car. It was even painted to match the rare hot-wheels magenta color as pictured above. In a more recent image of the vehicle (below), it looks as though it as has been repainted by the owner, along with the addition of some C6 wheels.
There are definitely some other really cool builds and projects in the show, but I don’t want to spoil the series for you. Moreover, since I’m not a TV or movie critic, I won’t be giving “Car Masters: Rust to Riches” an official view-o-meter percentage of pleasure-ability score. As a motorhead, I’ll leave you with this: The 8-episode run was worth the watch and I am looking forward to a Season 2– if Netflix and Gotham Garage decide to continue on. Until then, be sure to check out…
It’s not uncommon for us to receive an email like this from friends or co-workers. Mind you, the emails we get are never more detailed than what you see above, but it’s enough to start the conversation. The next logical questions are obviously: how old?, how many miles? and what’s your budget?
It’s always a blessing when you get clarification that the driver doesn’t want a Type-411 “Square Back”, Type-2 Bus or Beetle from the late ‘60s. Generally, folks are looking for something built in either the last 5 years or the last 10-12 years based on their budget. With that extra bit of information we can usually make a base level recommendation. These are aren’t always for or against purchasing a VAG product, but based on living with these vehicles everyday for generations, some of us at GTM might know a thing or two about Volkswagens.
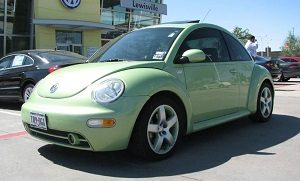
The original “Beetle” was the longest running production car ever made, globally (first sold in 1938), even though sales of the Beetle ceased in America in the late ‘70s, production and sales continued in Mexico and abroad until 2003! It’s true, you could still buy a vintage style Beetle right alongside a “New Beetle” built in the same factory from 1998-2003! #trivianight. The “New Beetle” was originally introduced to the masses as “the Concept 1” in 1997-98, to inspire a generation of hippies to upgrade from their current Beetle to a new one with air-conditioning.
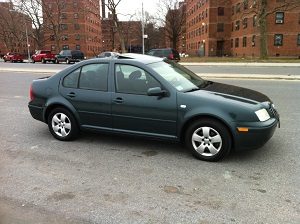
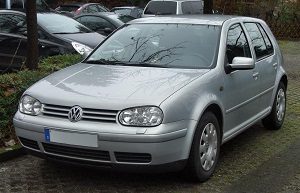
The base MK4 family: New Beetle (left), Jetta (center) and Golf (right)
Stereotypes about the Bug aside, there are a couple of *GOOD* things about the first generation “New Beetle” based VWs. Being built from 1998-2010 on the same Generation 4 (aka “MK4”) chassis that the 1999-2005 Golf/GTI/Jetta and Audi-TT makes for a large existence of support for all of the models and their variants. The MK4 chassis was unique in the VAG “A-series” evolution (not to be confused with Audi A4, etc) as it stands on its own compared to the MK1-3 and MK5-7+ cars. The MK4s also have a huge aftermarket and OE parts availability, as well as “new” products continuing to be developed for a platform that went End-of-Life nearly 13 years ago.
Items to consider when purchasing any MK4-based VW
Stay away from the early cars 1998-2001; Why? – VW was still sorting out some of the issues with the MK4 platform, and there were many “half-year-splits” and recalls on parts. This isn’t a major deal breaker, but VW improved upon the MK4 in the later cars saving you some headaches.
Any MK4 with the 2.0-litre (non-turbo) also known as the “2.slow” is going to be just that … *SLOW* – don’t expect a lot. They often get somewhere in the high 20s/low 30s on MPG – it really depends on how you drive it. The 2.slow literally makes 110hp – when it was new – its the same base 8-valve VW has been producing since the ’80s. It’s a motor that will last forever as it’s rather under-stressed. The 4-speed automatic that it is strapped to … well, that’s another story. It’s a slushbox and a junky trans compared to other offerings in the same vehicles.
The 2003 model year for the entire MK4 line up saw some big changes esp. to the 1.8-turbo engine, the most sought after engine is coded “AWP” and with it, the addition of variable valve timing, more power – bumped from 150hp to 180hp, and other odds-ends. In general, the 1.8-turbo is the engine to have if you wanted something with “pep or tunability”; the 1.8-turbo cars came with a variety of transmissions: 5-spd manual, 4-speed auto and 5-speed “tiptronic” auto. In the manual a 1.8-turbo can get low 30s MPG on the highway.
The VR6s – there are no VR6 (2.8-litre 12/24-valve, or 3.2-litre) powered Beetles, except in Europe (RSi Beetle); only the GTI, Jetta and TT came with that engine option.
In 2002-2004 there were also a limited edition series of MK4s: “The 3-3-7”, “The 20th Anniversary Edition”, “The Beetle Turbo S” and “The R-32” to name a few. All of these are considered “specialty models” in the VAG community, with fewer and fewer on the road, they are difficult to find and more expensive than their standard counterparts. Most, but not all of the specialty cars come in 6-speed manual and different body components.
In 2006, while the rest of the A-series line-up was upgraded to the MK5 chassis, the Bug remained on the MK4 platform but received a face-lift, as well as the addition of a Cabriolet (convertible) variant for the first time. The 2006+ bugs ditched the 2.slow for the 2.5-litre 5-cylinder (from Audi fame), which makes about the same HP as a bone stock 1.8-turbo and gets about the same MPG. The upside to the 5 cylinder is it’s a bulletproof engine, it revvs like a 4 cylinder and has torque like a 6 cylinder, and no turbos to worry about, and they sound pretty mean with an exhaust! The 5-cylinder comes with a couple transmissions options: Manual, 5-speed tiptronic and 6-speed DSG (direct sequential gearbox). The 2006+ bugs come with a lot more creature comforts, as well as some body restyling. But underneath it’s still a MK4.
And let’s not forget, there are the 50+MPG DIESEL (labeled TDI) cars. They’re not going to set the world on fire in terms of performance, but the MPG is second to none. These are pre-diesel-gate TDIs so nothing to worry about there. These came in 5-spd manual and 4-speed auto. The early models carried the ALH (90 hp) diesel until 2003, then upgraded to the BEW (110 hp) diesel through 2005.
What to look for when searching for a MK4
Check for wetness under the front carpets(especially on cars equipped with a sunroof), usually this means the drains are clogged and the headliner needs to be partially dropped to remedy / clean. It’s a good practice to blow compressed air through the sunroof drains once a year to make sure they are flowing correctly. There are 4 ports total (2 front, 2 rear).
Check for wetness in the corners of the trunk, esp. behind the tail lights, remove the liners and look under the spare tire for any signs of wetness or rotting. This is usually a sign the car was hit, or the trunk seals are bad. One other possible reason for wetness there would be that the rear windshield sprayer tank (or lines) have cracked and it’s leaking; usually you will see a residue witha neon-blue tint if this is the case.
For the Bug specifically, the bodies are 50/50 fiberglass and galvanized steel so there should be very little if any rust, unless the car was hit. It’s really tough to make those large swoopy fenders in steel anymore. As for the rest of the MK4s it’s more steel than plastic.
It is NORMAL for the headlights to turn a “milky” color as the lens are plastic and they tend to turn overtime / neglect. If you find a MK4 with super clear lens they have either been replaced or upgraded to glass lens from Europe.
It is also NORMAL for the interior plastic parts to feel a little “sticky” as the finish (which varies from car to car) is a flat, rubberized type of plastic. This feeling changes with temperature / humidity.
Beetle Only: Any beetle with color matched door panels (inside) and wheel inserts has XM radio these were known as “satellite beetles”
If you can look down from the top (or up from the bottom – only if the skid plate is missing) look for signs of oil leaks between the motor and trans, that is an indication of a failing rear main seal. It’s a $12 part, but requires the transmission to come off to replace.
Look for any signs of coolant leaks, especially around the cylinder head on the drivers side, usually an indication that the plastic fittings (which can be replaced with metal) are failing. This is cheap to fix, and we usually partner it with a timing belt service, replacing the thermostat housing, primary radiator hoses and other known-to-fail parts.
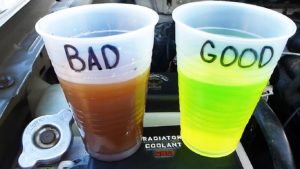
All VWs *should* use either pink/purple factory coolant or orange Dex-Cool coolant. If the car has yellow/green anti-freeze it needs to be flushed out immediately as those types of antifreeze are not designed for aluminum cylinder heads (this applies to all MK4 engines).
If you see a “dark green” oil under the car– that’s a power steering system leak. You’ll also hear the pump whining when you turn the wheel lock-to-lock when sitting still. This will need to be serviced *soon* – running the pump/rack low on fluid can cause serious damage to either component. The culprit is usually bad crush washers or the compression fitting on the power steering line where it changes from hard-to-flexible-to-hard again.
Only applicable to 1.8-turbo cars: On your test drive, and if the brakes feel spongy after driving hard or “need to be pumped” to stop its not usually a problem with the brakes so much as the brake booster, these are known to fail on the high mileage MK4s, and it’s the result of a $6 check valve that fails and blows out the booster. The booster change job is an absolute nightmare, and not recommended as a DIY, its absolutely frustrating.
Some MK4s, but Bugs especially, have issues with the door lock mechanisms freaking out – *never* leave the car running with the windows shut, *ever* – the car might lock on you, leaving it running with the keys inside… or better still the alarm goes off randomly (always in the middle of the night) or the car unlocks for absolutely no reason. VW recalled/updated the parts but not all cars received those fixes.
Always remember to check the gas tank and trunk switchesto make sure they work. For whatever reason, these switches are positioned in such a way, that if you ever opened the windows on a rainy day (say at a toll booth) the water would make a bee-line straight for those switches. Operating the switches you should hear the solenoid activate from inside the car, and the gas filler door and trunk should open. If they don’t, it’s either a problem with the switches or the solenoids. Again, these are known to go bad on some cars. If you have to pull on the switch a couple times to get the gas filler open, it’s a solid indicator those mechanisms are going bad.
Lastly, see if there are any records on the car, you really need to know if/when the timing belt was changed; service interval is around 80k. High mileage isn’t necessarily a scary thing on any of the engines, but newer the better. If you do get a MK4, I would recommend an immediate Timing Belt, Water Pump, etc service. 5-cylinder and VR6 models are exempt as they use chains instead. On a 4-cylinder MK4 doing the timing belt service yourself is about 4-6 hrs labor, and $200 in parts (depending on quality).
This all might sound like a turn off, but it’s just minor stuff, we assure you. Maintaining a MK4 is pretty reasonable and you can source nearly all your parts fromwww.ecstuning.com ; and because it’s german, if you don’t plan to do some DIY you definitely need to find the right shop to take care of it, so that you’re not stuck paying dealer prices. We have a few we can recommend.
We could go off about safety ratings, Consumer Reports, J.D. Power & Assoc. Awards and the like, but that is all research you can do on your own if it helps make your decision for/against a VAG product easier. But all that aside, owning a Volkswagen is one of those purchases you’ll always remember, be it for the best or worst reasons. There is just something about them.
We’ve always appreciated the late-’80s marketing mantra from VW “for the love of driving” – which you’ll find to be true when you get behind the wheel. Some would also argue “if it doesn’t fit in a VW, you shouldn’t own it” playing to the “hot-hatch” nature of most A-series VWs including the Bug! At the end of the day, VWs are well engineered and generally easy to maintain, but like anything else – not to be neglected. If you take care of your VW, it will take care of You.
> ok, WOW – that’s a lot of information <
But wait, there’s more … continuing to answer the original question from the email there is also the latest generation “MK6” based Beetles which will be your 2011-current. Those come with 2.5-litre 5-cylinder and 2.0-litre turbo variants, in Coupe and Cabrio. Much newer, nicer and more expensive cars.
Note: A late model MK4 based Beetle 2006-2010 can be picked up for around $6000 with reasonable mileage.
A good place to find a “run of the mill” Bug will be throughCars.com (try this link)
If you wanted to find something, slightly more maintained or “modded” you can always check out: VWvortex Marketplace.
… Stacy, we hope you found all this data overload useful, and if you need help searching, please don’t hesitate to give us a shout. We wish you the best, and hope that you will join the VAG community. Good Luck on your Search! – Abby. #FAHRVERGNUGEN
Only a few GTM members might recognize the name “Paul Hollywood” and for those that don’t, he’s one of the famed European bakers behind the popular “Great British Bake Off” which has gained popularity in America through Netflix. I won’t deny that both my wife and I enjoy watching the Bake Off quite a bit. I’ve often wondered if like a lot of British celebs… is Paul a bit of a “petrol head?” – thinking back, I don’t recall if I’ve ever seen him as a guest on Top Gear or The Grand Tour, so I figured – probably not.
Be that as it may – I was recently scrolling through the “Recommended for You” section of Netflix and was startled when I came across the title “Paul Hollywood’s Big Continental Road Trip” — hmm, maybe he was a car guy? – or was Netflix was just baiting me into watching some sort of travel cooking show? What finally pushed me over the edge was the supercars prominently displayed on the cover art.
Finding time to set aside to watch this 3-part mini series, my perception of Paul was definitely rewritten. Quoting some of the opening monologue of Part-1, I quickly came to realize Paul shares a lot of the same ideals around cars that many of us do: “I’ve been into cars for as long as I can remember … [cars] are more than just transport from A-to-B, they are a thing of enjoyment, they are a thing for me that I use to de-stress.” – Amen to that. #respect
Did you know that Paul drove for Aston? – Neither did I.
The plot of the series: in short – set about mainland Europe driving through some of the most gorgeous locations, twistiest roads in all sorts of different vehicles with a variety of guests in the right seat. With some Test Tracks and Factory Tours thrown in for added flavor. Paul makes a point in setting the premise for the show by explaining: “What really fascinates me is what cars say about their owners, and the people who made them.” This is actually another car culture ideal I believe to be 100% true. #likecarlikeowner. Part 1 consists of a 1,000+ mile drive over 6 days through Italy and here are some of the vehicles featured in the first segment:
Parts 2 and 3 are spread across Germany and France using a familiar format carried over from Part 1. If you happen to have a couple extra minutes read about VW Part No. 199-398-500-A. #alwayslearning. I won’t give away all the spoilers, so you’ll have to tune in to see what happens in those episodes, but I can say they are quite enjoyable and the cars are cool. (The clip below, which we used in our Fascination: Fiat Panda article, gives you a glimpse into the show).
Overall, the series does a great job of mimicking the “epic adventure” format were accustomed to watching on other programs without completely copying them. At times it feels produced in the same way the Bake Off tends to flow, with moments of monologue smattered between the scenes. The series has a good blend of reality, history lessons and is thankfully kept light-hearted so as to not come off as a proper documentary. The guests make the show feel a little bit like Sienfield’s “Comedians In Cars Getting Coffee” but more in the vein of giving you cultural perspective rather than trying to make you laugh. The upside for non-car people is that the show isn’t all about the facts, figures and specs but keeps it high-level for all audiences. More importantly, as a petrol head it will definitely keep your interest. Enjoy!
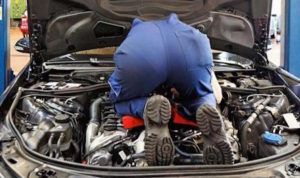
Car Care … ugh, cringe, yuck. Car Care and General Vehicle Maintenance used to be one of those common household chores. Folks across America with hoods popped on the weekends, kids “holding a light” prepping the family people mover for their next trip. Add a quart of oil (check!).
Nowadays, many people prefer to bring their vehicle in for service. And in the last 25+ years or so, Car Care has morphed into this dark art where only specialists, often held in the same regard as the wizard Merlin, are able to properly maintain your vehicle.
At GTM we’re a bit “old school” and prefer to perform a lot of our own wrench turning. With many trained and shade-tree mechanics on staff, we were able to compile some useful information that you can use to save your self some $$$ and quickly diagnose and/or keep track of your vehicles health. Let’s learn how to use four out of your five senses to help perform a simple diagnosis and health inspection on your vehicle.
First, build a map of your engine compartment
Your map will vary from vehicle to vehicle, but having an understanding of where all of the critical components are located is essential to a proper visual inspection. Example below.
Know Your Colors
First let’s learn how to identify and diagnose fluid related issues with your vehicle. Using your map we can now build a list of all the fluids your vehicle may have and how to identify them:
Fuel (Gasoline, Diesel, Natural Gas)
Engine Oil: Brown – shade varies based on the manufacturer; usually the same shade as maple syrup
Transmission Fluid: Manual Transmissions use gear oil which is a light tan color and Automatics use ATF which is a rich garnet red color.
Differential Fluid (for RWD and AWD vehicles): Similar to gear oil.
Coolant (aka “Anti-Freeze”): Different colors based on the manufacturer.
Yellow/Light Green – generic; often found in domestic vehicles
Red/Pink/Violet/Purple – often found in German Cars (VAG products)
Orange – GM/Dexcool or for aluminum engines (e.g. Corvette)
Blue – often found in BMWs
Power Steering Fluid: Dark green in European Vehicles and garnet red in Domestics (Note: many domestics use ATF as power steering fluid.)
Brake Fluid: A light golden color similar to Vegetable Oil.
Windshield Washer Fluid: Generally Light blue, similar to Windex.
Tip: Any fluid that isn’t Oil, and *is* brown has probably gone bad. Consider changing your fluids as soon as possible.
The base color of your oil varies on the manufacturer (as seen in 1-5 above), but the end result is the same for all. As the oil ages, breaks down or burns, it will look like the picture above (6-7+). A good rule of thumb is to change your oil every 4 months or 5,000 miles, whichever comes first. Performing a periodic oil analysis will give you clear indicators of anything that might be going wrong in your engine. We recommend sending your samples to BlackStone Labs
Other visual inspections
Check your tires Do you have any rollover? Unever wear? How much tread depth do you have left?
Rollover is an indication of improperly inflated tires.
Uneven tire wear is a good indicator you might be in need of an alignment
Tread depth… how close is the top of the tread to the “wear bar”? The closer you are the less time you have left before needing a new set of tires.
Do all of your lights work? Have a friend help you and visually inspect all of your vehicles lights, including:
High/Low beams (headlights)
Running lights (front/rear/side)
Hazard lights (flashers/4-ways)
Turn signals (left and right)
Brake lights
License plate lights (many states can fine you for having this burnt out)
don’t forget about your reverse lights!
and IF your vehicle is equipped with Fog lights, check those too.
Is there an odd or foul odor emanating from your vehicle?
We’re not talking about the forgotten bean & cheese burrito that rolled under the seat last week… Let’s review:
Coolant: Sickly-sweet, almost citrus-like
Oil: Burnt fried chicken
Brakes: Fresh ashes from a fireplace.
Transmission Fluid: Damp woodsy smell, very unique, “funky”
Clutch: Burning cork; if you’ve ever put a pot/pan right off the stove onto a cork hot pad, it’s that smell.
Washer Fluid: Glass cleaner
Refrigerant (Freon/R134) – Cool, sweet, “heavy”
Fuel: Smells like fuel, make sure it’s not on your hands or shoes 🙂
Lean Exhaust: Lit cigarette
RichExhaust: Raw / Unburnt fuel
Catalytic converter: Sulfur or rotten eggs
Carbon Monoxide: Odorless and Deadly; If you get really tired or sick after driving your vehicle, you might have an exhaust leak which is giving you CO poisoning. Get the car to a repair shop ASAP!
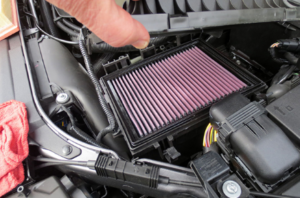
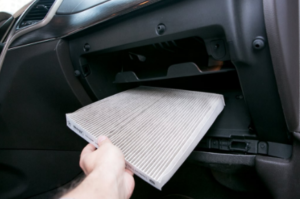
Did you know your vehicle has 2 kinds of air filters?
Engine Air Filter: Keeps gunk, leaves and other things that don’t belong in your engine, out of your engine. The longer you drive without a regular cleaning or filter change the more likely this filter will get clogged. Check your owners manual for the recommended replacement interval.
Cabin Filter: Many non-engine related odors inside the cabin come from a dirty cabin filter. The cabin filter is designed (like your house filter) to remove particulates, allergens, and odors from outside the car and some from the engine compartment. Cabin filters should be changed regularly. We recommend at least once a year.
Is your car smoking?!? – What color is the smoke?
White smoke while the engine is running is a sign that the engine is burning coolant (anti-freeze). You might have a leak or blown head gasket that needs to be taken care of immediately.
Black smoke means the car is running too rich. Unburnt fuel is leaving through the exhaust. You should consider getting a tune up.
Grey smoke when just turning on the vehicle is generally OK. This means there is condensation (water) in the exhaust system which is being converted to steam.
Blue smoke means the engine is burning oil. Some older engines tend to burn a bit of oil and that is normal. However, large plumes of blue smoke – especially under acceleration – is indicative of a larger problem.
We know that this guide might not cover everything particular to your vehicle, but there is one source that always does: your VEHICLE OWNERS MANUAL. Consult your manual often, it really does have all the answers, including where to find components, appropriate service intervals and even maintenance instructions. If you’re interested in learning more, contact one of the friendly folks at GTM about our Car Care Clinic.
Top Tip: if you take care of your vehicle, your vehicle won’t let you down.
Someone wise once said: “There are no bad ideas, only great ideas that go horribly wrong” — arguably this is the premise behind 90% of all Concept Cars we’ve seen at the larger International Auto Shows. But inquiring minds want to know “where are they now?” – Polling our audience, we compiled a list of Concepts to research, rolled up our sleeves and started investigating.
Concepts usually evolve into something else…
During our research we quickly came to the realization that some concepts were completely scuttled but others evolved into something else entirely. Let’s take a look at some of those evolutions from prototype to production.
The Audi Avus had a lot of things going for it… It was Audi’s first “mid-engined super car” boasting specifications like a Zero-60 time of 2.9 seconds with a top speed over 200 mph. Built on an aluminum space frame (first introduced on the Audi Spyder concept) with a turbo-charged W12 configuration. It was well ahead of its time, and gave inspiration to better known VAG products like the Nardo W12 and the W16 powered Veyron. Technology from the Avus continues to be used in mass produced VAG products today. #livelongandprosper
We all know about the epic battles between Ford and Ferrari during the ’60s. LeMans gave way for the original Ford GT-40 to evolve and flourish; We all loved the GT-40 MK2 its a timeless design, one that Ford (until recently) wasn’t really able to recapture in the hearts of enthusiasts. 20 years after the GT-40s retirement the designers at Ford decided to release the radical GT-90 in 1995. Looking like something out of the movie Minority Report, the GT-90 never really caught on, especially against other modern supercars of the era. It would take Ford another 10 years before a worthy successor to the GT-40 would hit the market.
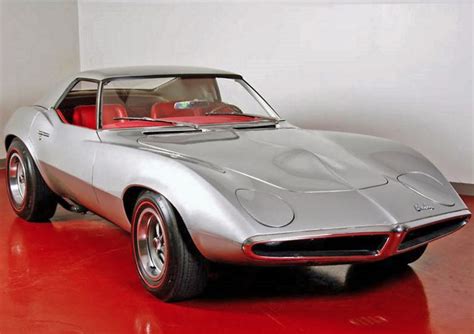
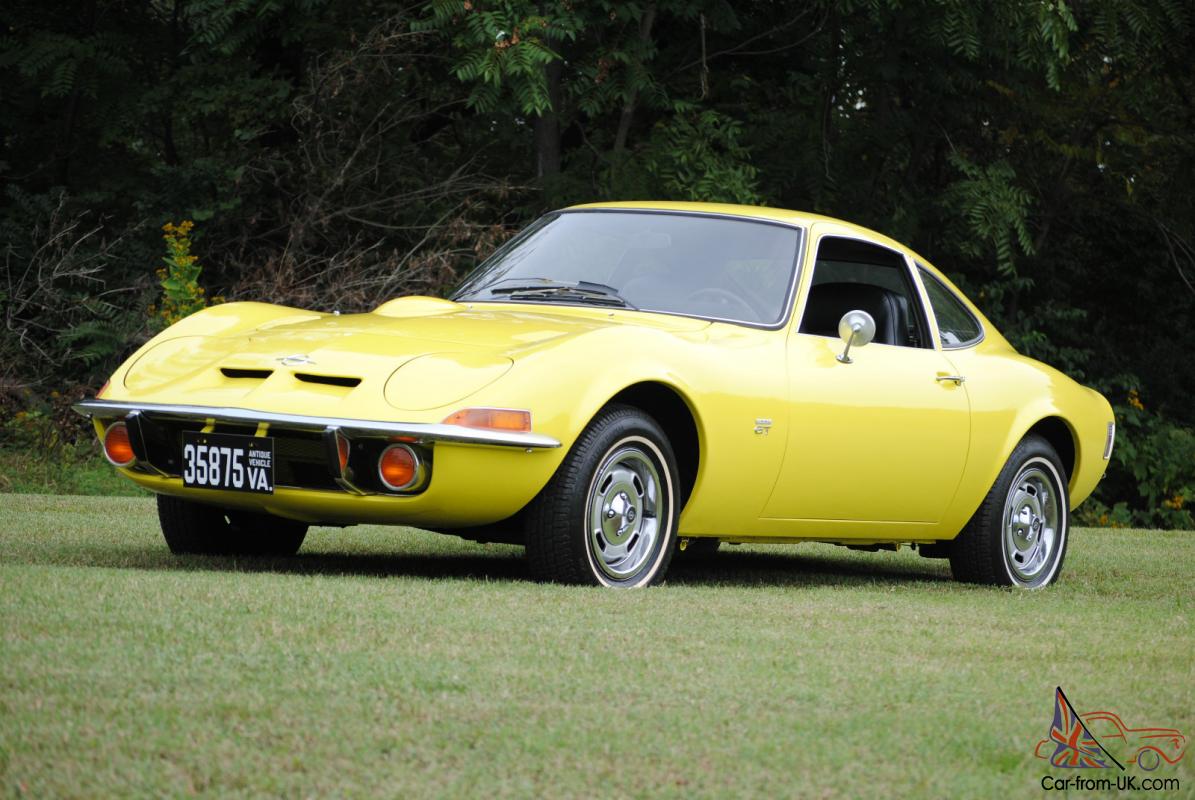
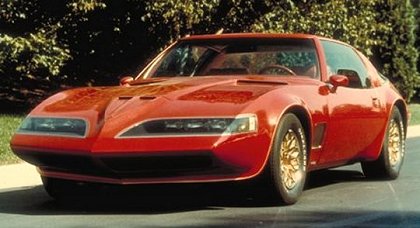
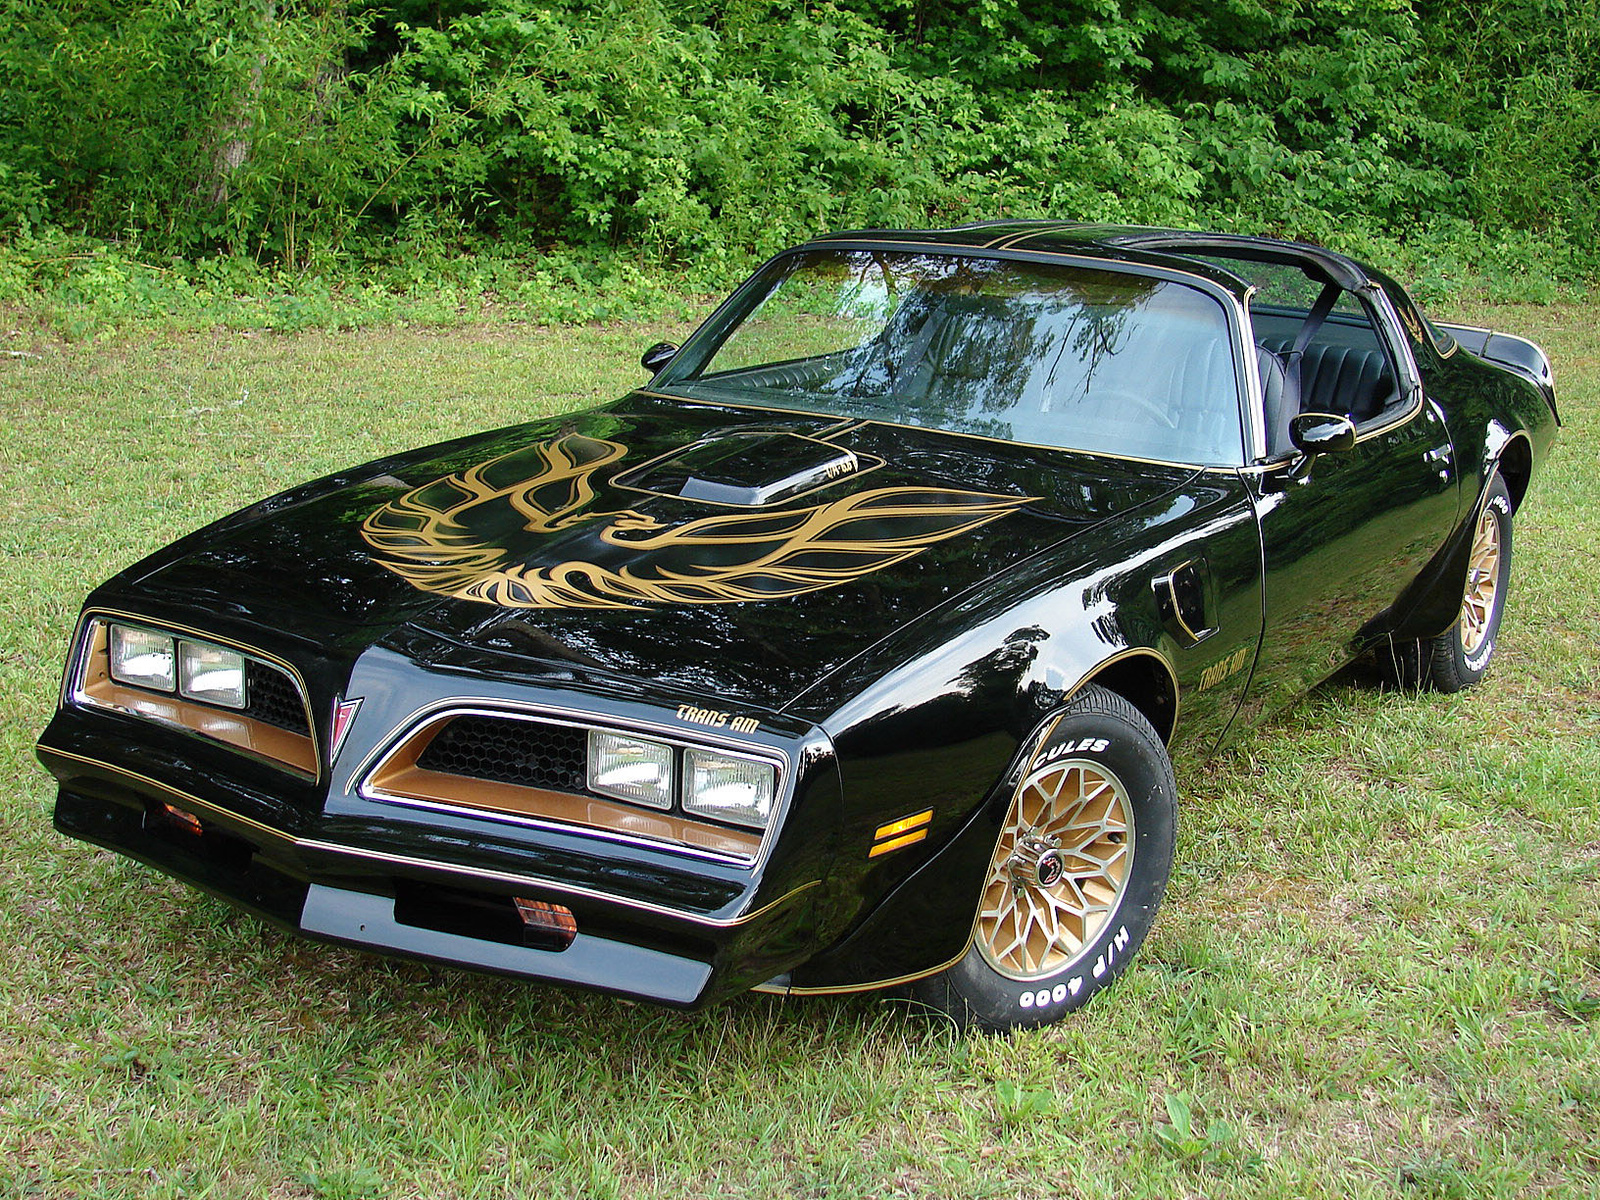
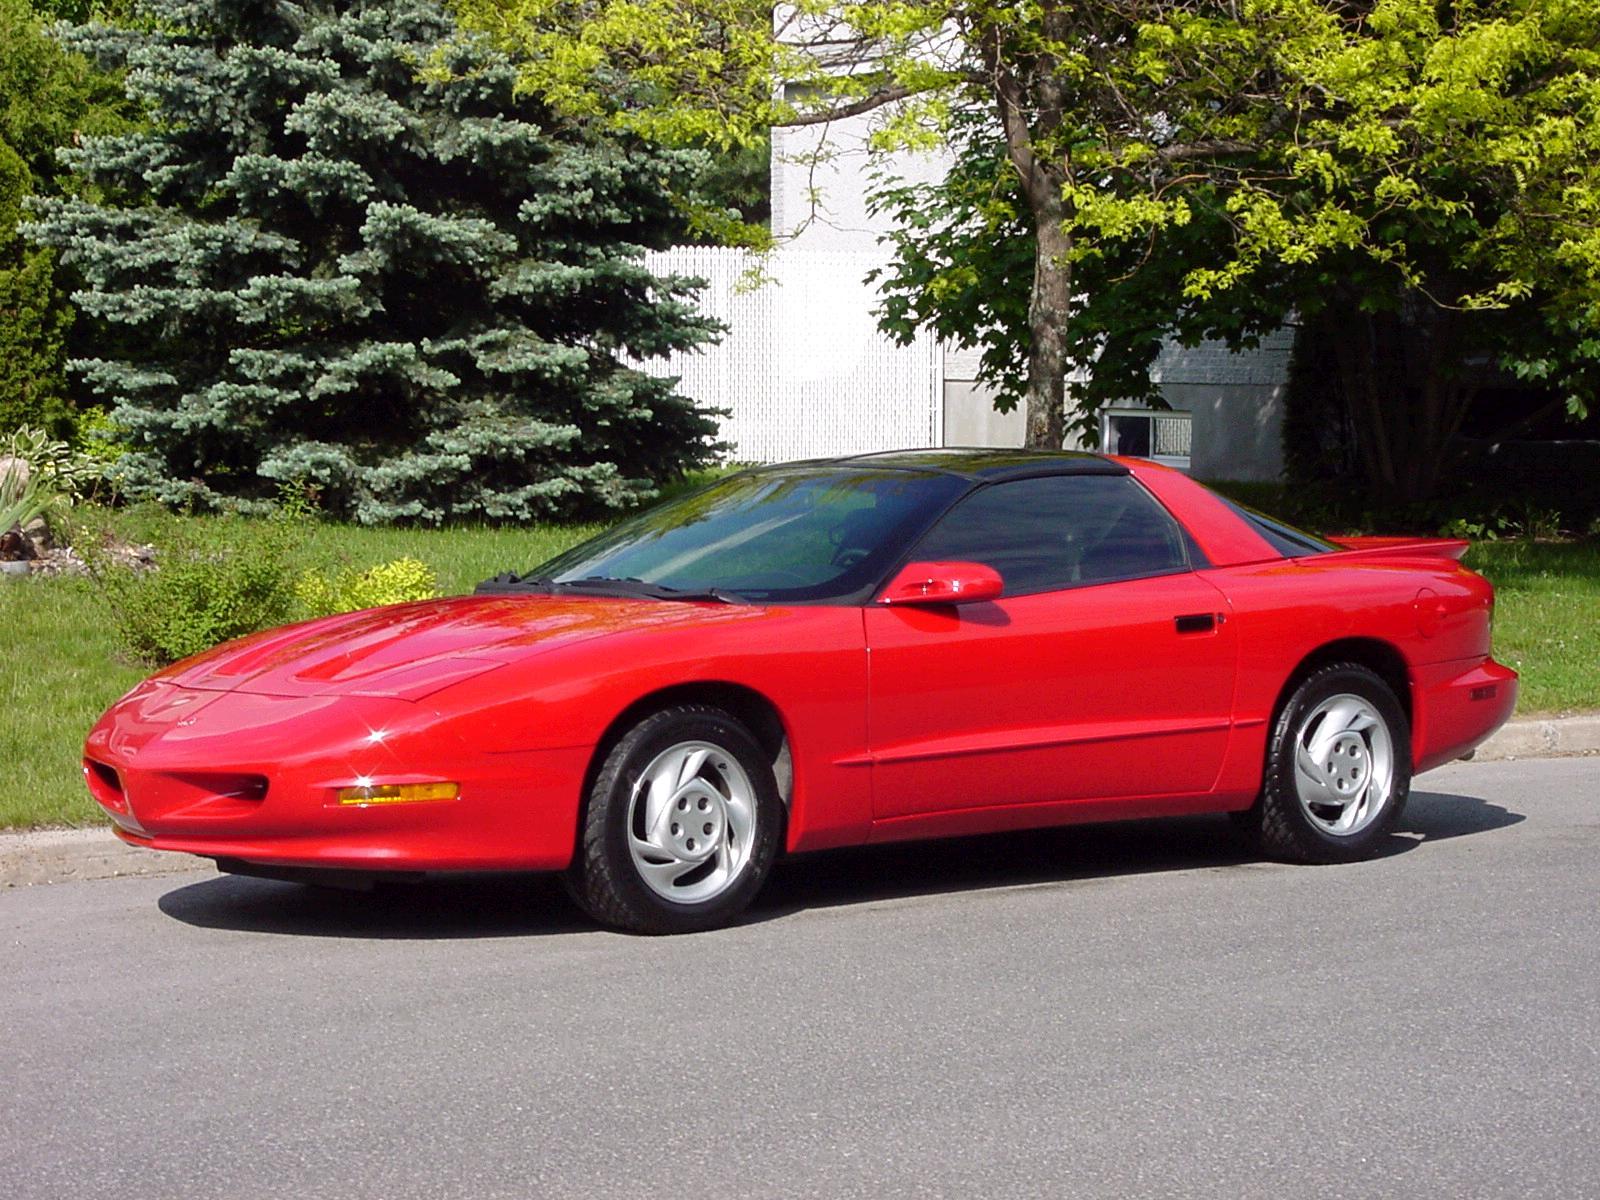
The sorted life of the Pontiac Banshee
Speaking of prototypes that never really caught on, The Banshee. Four iterations of this concept car emerged from the depths of GM between 1964-1988. Three of the 4 designs all morphed into something we recognized on the roads.
In 1968, the engineers at Alfa Romeo developed a prototype that would unknowingly change the way we looked at sports cars through the late ’70s and ’80s. In contrast to the Lamborghini Miura which is considered an early wedge, the Miura still had swooping lines, curved hips and exposed lights. The Alfa Romeo 33 ‘Carabo’ brought us to the future with a true wedge shape, hidden headlights, and for the first time: scissor doors. Little did Alfa Romeo know, this design would go on to inspire Lamborghini to create the first generation Countach which would evolve into the Jalpa, Countach LP and Diablo. Other manufacturers like: DeTomaso, Lancia and Lotus would also take cues from the Carabo.
Concepts are often just that, concepts. The daydreams of bored engineers looking to inspire them to “the thing that leads to the next thing”or sometimes its a corporate push to re-imagine a brand that has lost it’s way. The stories behind many concepts and prototypes are fascinating, the pressure to complete them for a major show or the “borrowed from the parts bin” approach to piece-meal the vehicles together are astounding. Did you know Porsche has an entire warehouse that has been converted into a museum that houses nothing but rejects, oddballs and concepts?
And others should never have been built…
Tune in everywhere you stream, download or listen!
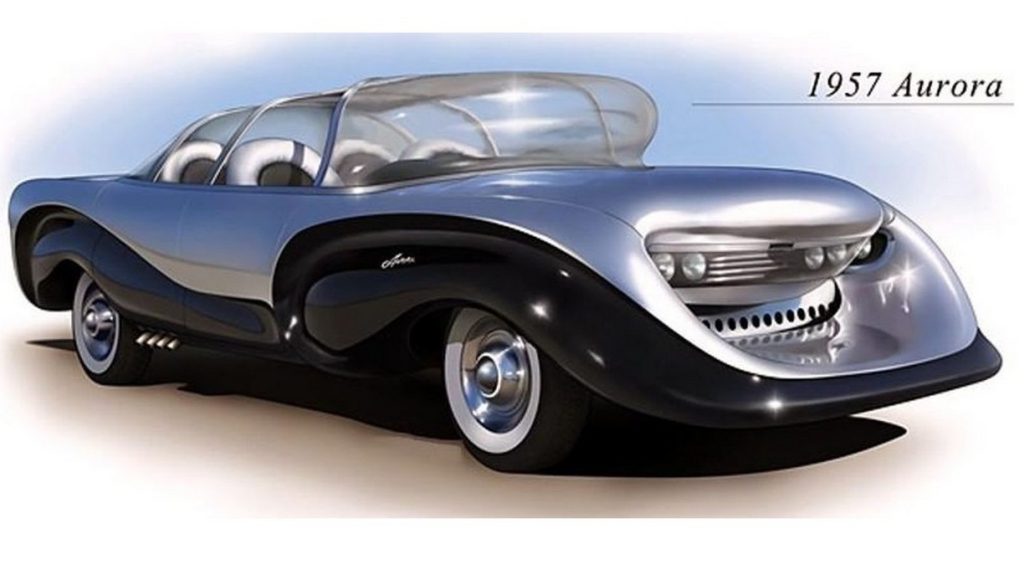
Touted as the “safest car in the word” we’re rather pleased that the 1957 Aurora Safety Car was never produced. It would have claimed victor as “ugliest car ever” (and it did in our Podcast Episode) but instead goes down as the ugliest concept car ever built – to this very day.
Regrettably, a showcase of the ones that never made it.
Mazda Furai
Cadillac 16
Audi Spyder (Tap picture to learn more)
GM EV1 (Tap picture to learn more) - although the GM-EV1 was considered “sold” to a limited number of people in the US in 1996, including famous movie stars like Jamie Lee Curtis, they were always considered prototypes by GM and were actually leased to the drivers with the understanding that they were to be used as long term test vehicles and eventually “recalled and destroyed” in 1999.
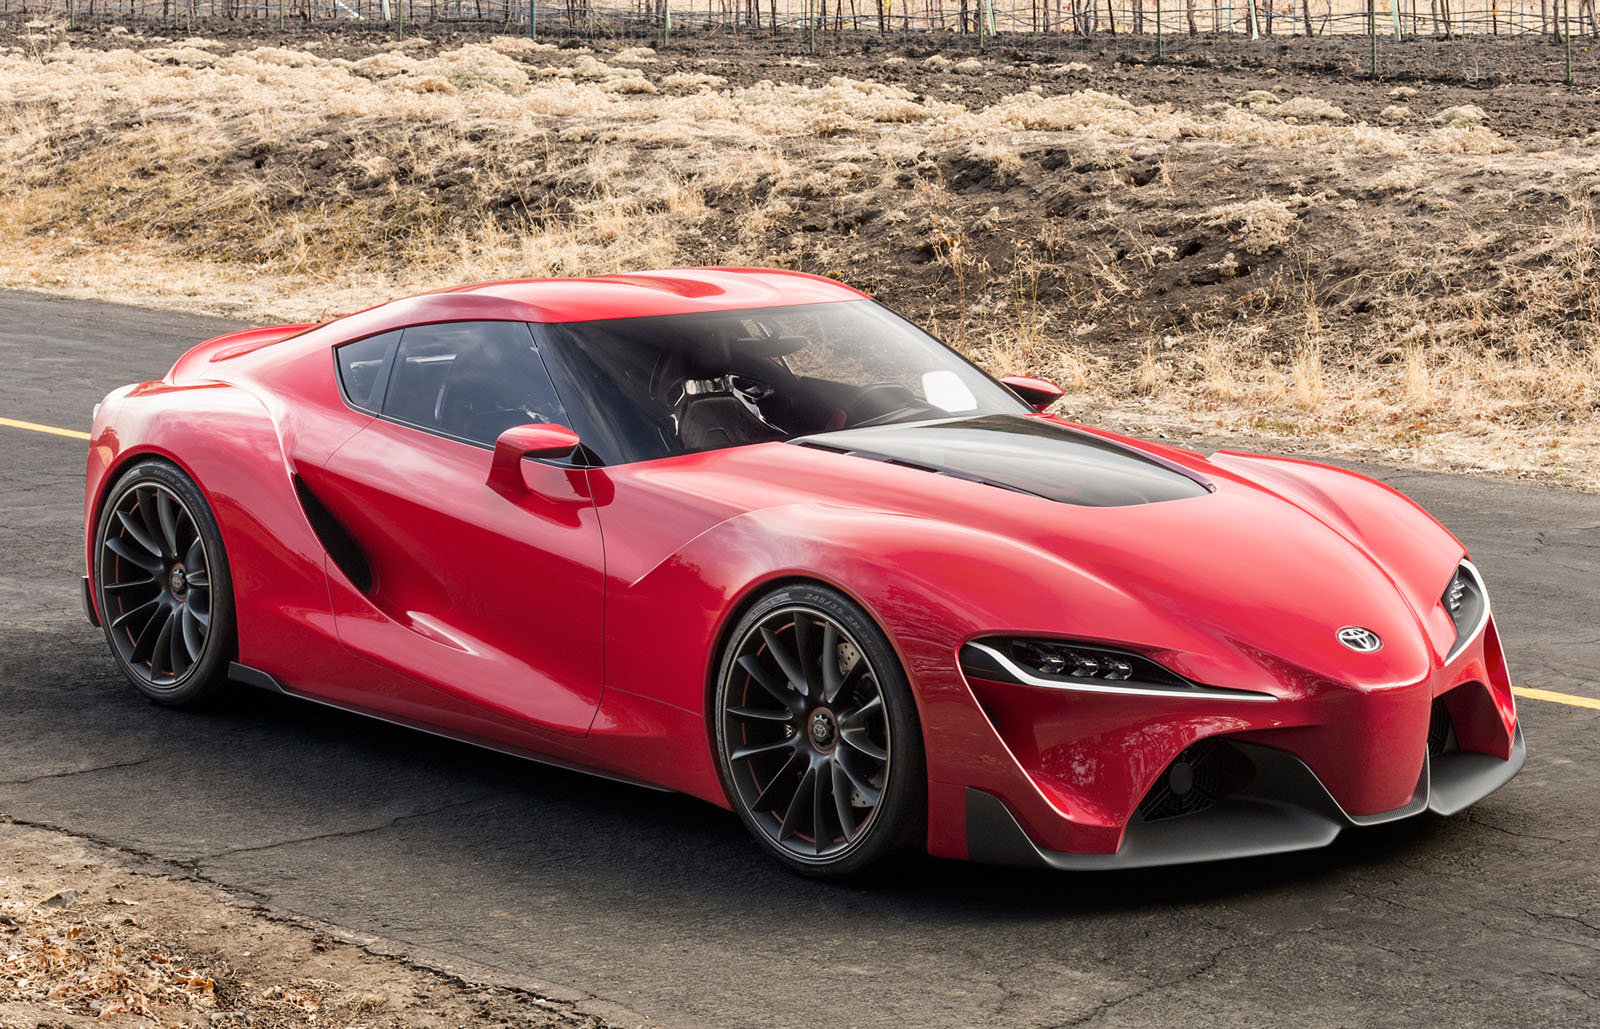
And one’s we’re still waiting for… Promises, Promises (sigh).
**[editors note] – in 2020, these two cars finally became a reality! woot! **
Toyota Supra
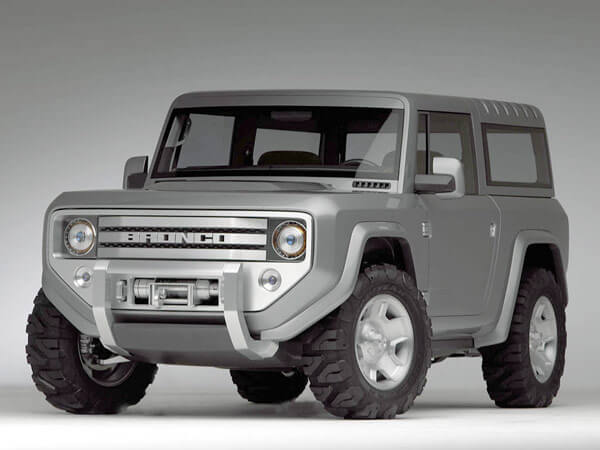
Ford Bronco
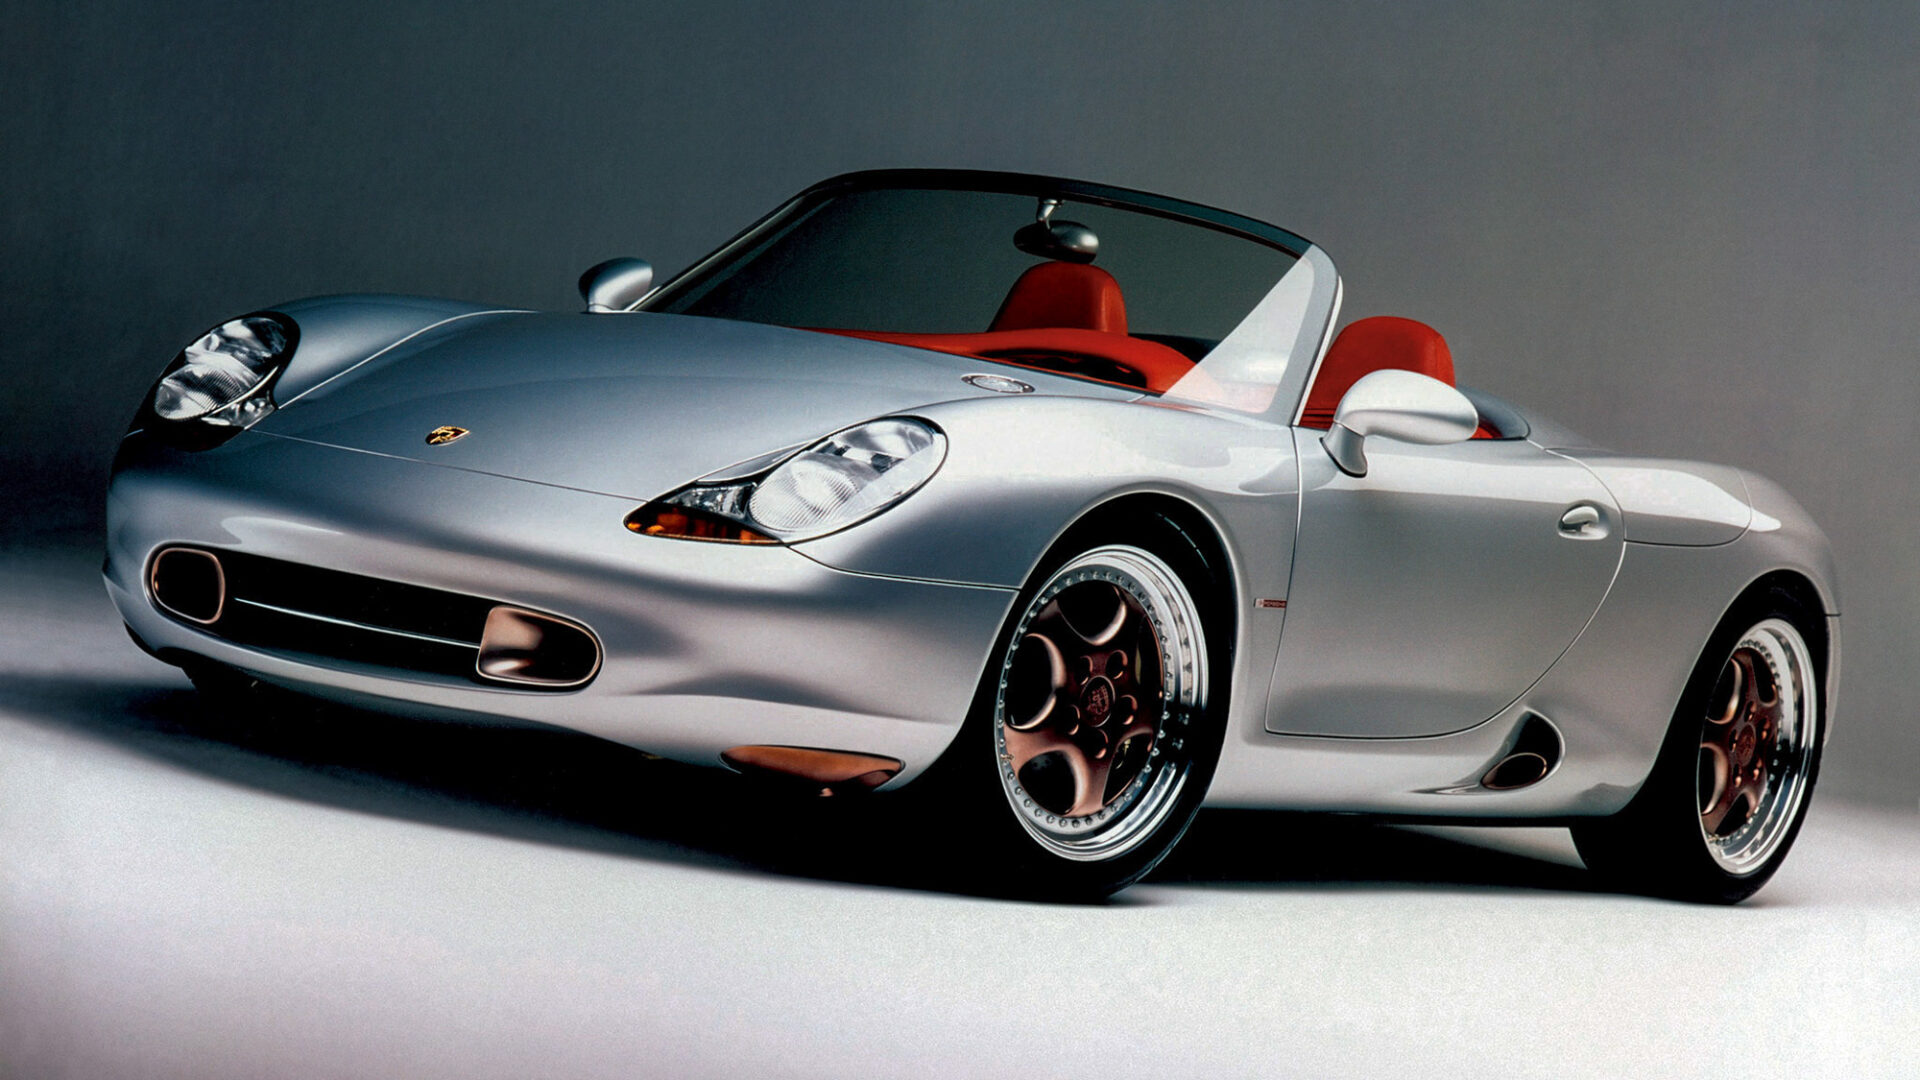
All-in-all, concept cars are pretty awesome! In the automotive world, they are the purest form of imagination for both the designer and the consumer a-like. I can honestly say I had plenty of concept posters hanging on my bedroom wall as a kid: the Banshee IV, Porsche Boxster (seen below), GT-90, Isdera Commendatore C112i, and the VW Concept R – just to name a few.
What concept car has most inspired you? What car poster was hanging on your wall as a kid Leave your comments below, we’d love to hear about your favorites. #neverstoplearning
Ever wonder what some of the terms that petrol heads constantly use mean? Avoid the confusion with our glossary of racing terms! Expanded information on these topics can be found on Paddock Pal.
Term
Synonyms
Explanation
“The Line”
The line is the route around a course and through its corners which will enable the car to go the fastest. Different cars require different approaches to stay on the line. The most important corners are those leading to the longest straights.
(Brake) Caliper
Brakes, Caliper
A form of brake in which a pair of arms, carrying brake pads, move inwards and press on the the rotor.
(Brake) Pads
Brakes, Pads
Thin blocks (of varying compounds) that grip the rotor in a caliper brake system.
(Brake) Rotors
Brakes, Rotors, Disc, Brake Disc
The disc that revolves while the car is in motion in a caliper based brake system.
Acceleration
N/A
The addition of speed, normally caused by an engine either pulling or pushing a vehicle
Aerodynamics
The science dealing with a car passing through the air
All Wheel Drive
AWD, 4×4, Quattro, Syncro
Vehicle configuration where power is distributed to all four wheels to create motion.
Alternator
An on board generator that produces an alternating current, to keep your battery fully charged during the operation of a vehicle.
Anti-lock Braking System
ABS
Anti-lock braking system is an automobile safety system that allows the wheels on a motor vehicle to maintain tractive contact with the road surface according to driver inputs while braking, preventing the wheels from locking up and avoiding uncontrolled skidding.
Apex
The center point of a turn with respect to entering or exiting
Battery
Generally a lead-acid storage battery in a motor vehicle; with a 12-volt battery of six cells; the heart of the car’s electrical system.
Battery (AGM)
VLRA, Maintenance Free, Gel, Sealed Battery, SLA
A VRLA battery (valve-regulated lead-acid battery), more commonly known as a sealed battery (SLA) or maintenance free battery, is a type of lead-acid rechargeable battery. Due to their construction, the Gel and AGM types of VRLA can be mounted in any orientation, and do not require constant maintenance.
Battery (Dry-cell)
A cell in which the electrolyte exists in the form of a paste, is absorbed in a porous medium, or is otherwise restrained from flowing.
Battery (Lead-Acid)
A lead acid battery is a secondary cell, meaning that it is rechargeable. It is very common in cars and trucks. It contains plates of lead and lead(IV) oxide in a sulfuric acid solution. The lead(IV) oxide oxidizes the lead plate, making an electrical current.
Brake Modulation
Easing off of the brakes slightly when you feel the wheels locking then reapplying the brakes. ABS does this automatically.
Camber
The tilt of the wheel from the vertical, viewed head on. Positive Camber means the top of the wheel leans away from the vehicle centerline. Negative camber has the wheel leaning toward the centerline. Any wheel camber has two effects. A wheel tends to run in a circular path toward the direction in which it leans, and any time a wheel is not running at a right angle with the road surface, the flat of the tread is not fully in contact with the road. Since a vehicle tends to lean away from a turn due to centrifugal force and the wheels tend to lean with it, negative camber is sometimes used so that the thread is flat on the road surface when it is on the outside of a corner. This is when you most need the traction.
Carburetor
Carb
A device in an internal combustion engine for mixing air with a fine spray of liquid fuel.
Caster
The more-or-less vertical axis about which a wheel rotates during steering. When the top of this axis leans toward the rear, like the front fork of a motorcycle, it is positive caster. The primary effect of positive caster is that the tire contact patch on the pavement trails behind the point at which this axis contacts the pavement. This causes the wheels to tend to follow the caster axis and run straight or return to straight ahead after a turn.
Center of Gravity
The center point at which the vehicle will balance
Centrifugal Force
The force towards the outside of the circle
Centripetal Force
The force towards the inside of the circle
Cornering
Driving in an arc predetermined by either limiting barrier such as a pylon, or be mental design on the part of the driver
Deceleration
The slowing of a vehicle, normally done by applying braking pressure
Diesel (engine)
An internal combustion engine in which heat produced by the compression of air in the cylinder is used to ignite the fuel
Dipstick
A graduated rod for measuring the depth of a liquid, especially oil in a vehicle’s engine.
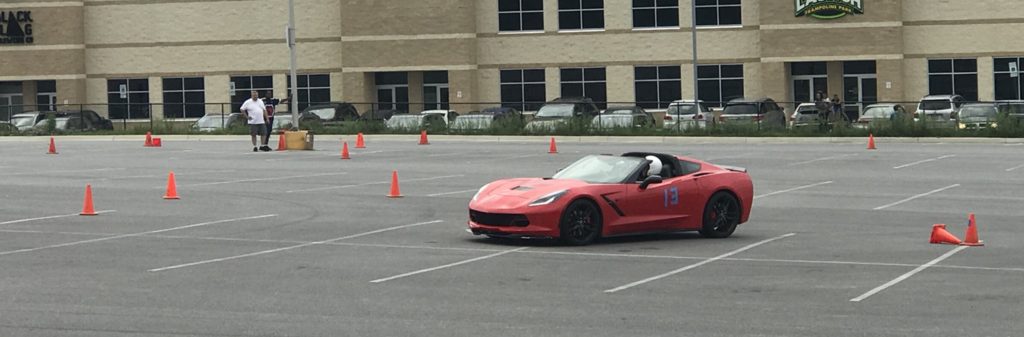
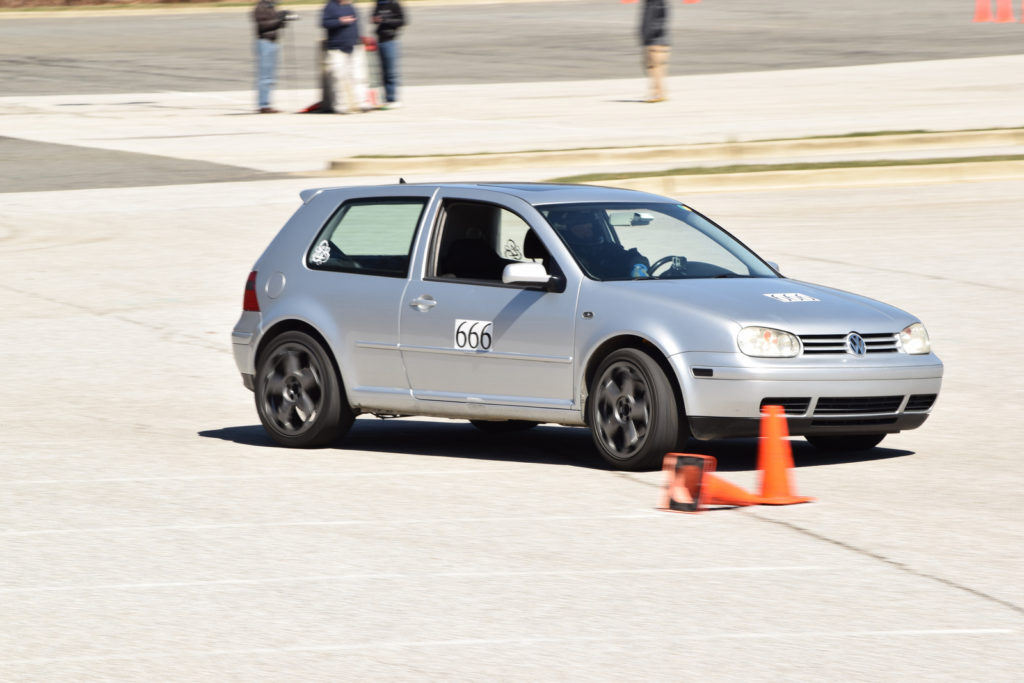
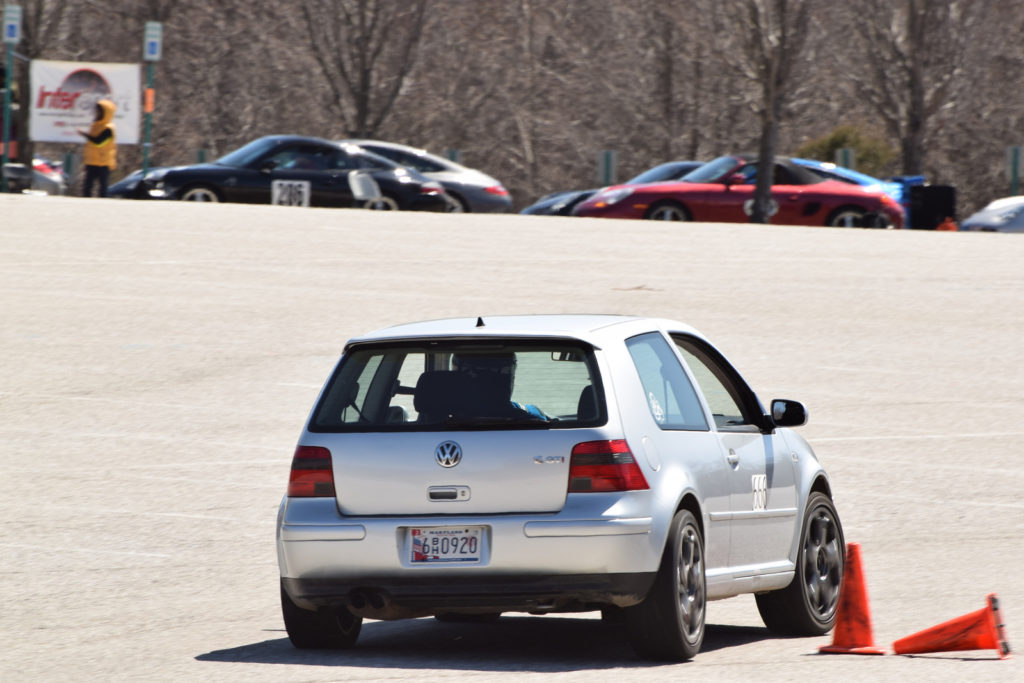
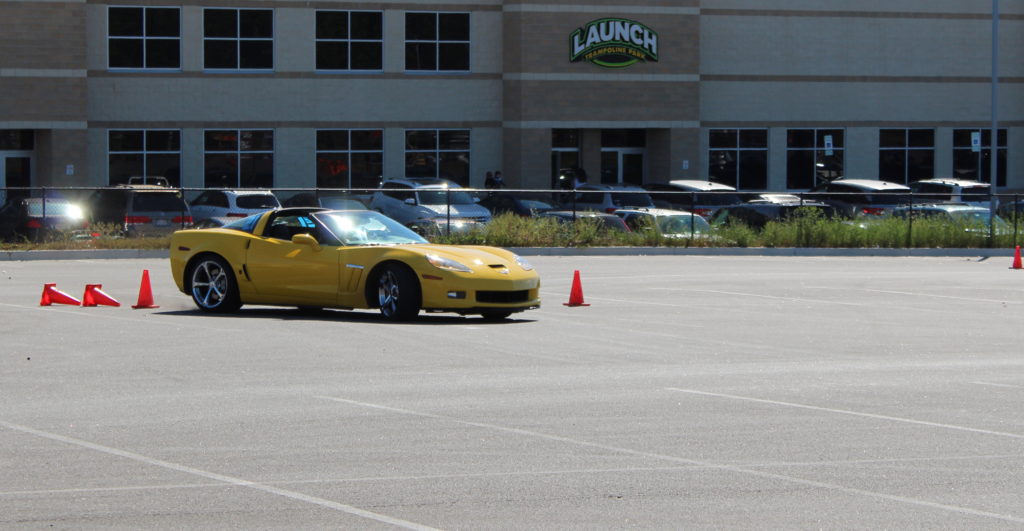
Autocross (Auto-X) is a sport of trying to navigate your car through a defined course made up of pylons usually on a large parking lot, faster than your competition. Autocross courses are set up using soft orange traffic pylons (aka “cones”) which will not damage your car.
Events are run at speeds usually between 40-65 MPH, usually in 2nd gear. Autocross is a “performance driving event” and a safe way to learn how to drive your car at its limit. You not only learn how to handle your car at speeds that you drive daily, but you also:
Gain confidence in your driving ability.
Learn the limits of your car’s brakes
Learn correct seating, hand, and feet positions
Learn the limits of your car’s tire adhesion
Finally, Autocross is a social gathering of new and old friends and LOTS OF FUN!!!
Your first Autocross Day
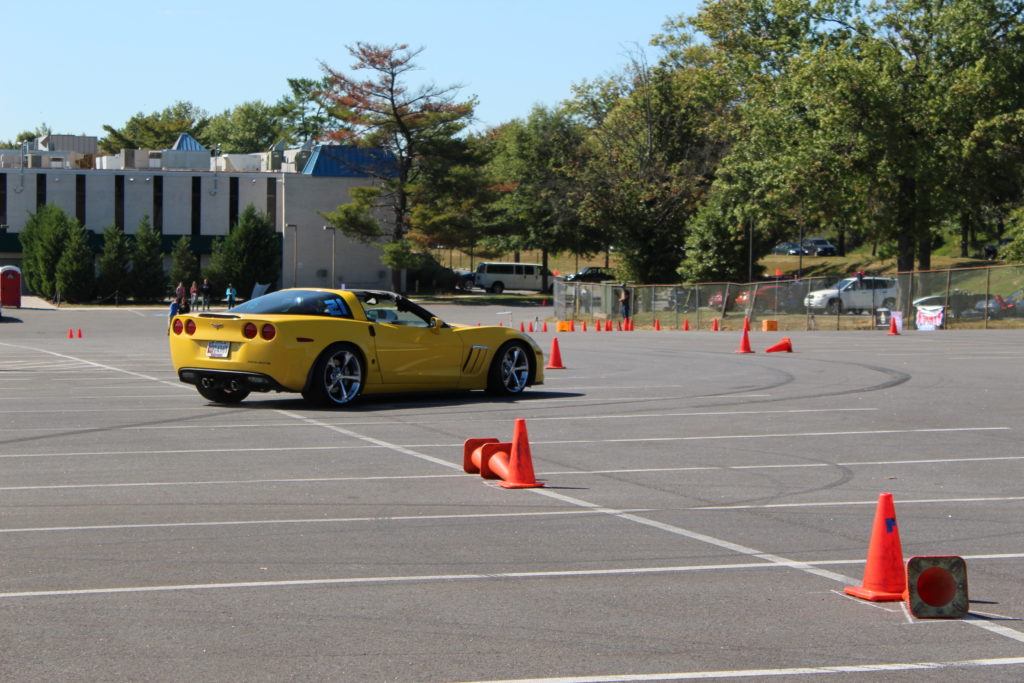
A course will be setup on a large parking lot. Soft traffic cones will be used to form a course consisting of turns, slaloms, and straight areas. Make sure to ARRIVE EARLY — See what goes on… and GET INVOLVED.
When you arrive … Prepare your car: Remove all loose items from your car — floor mats, driver’s carpet, coffee cups, etc. Check tire pressures and chalk your tires (Read on for more on Tires).
Register
Register at the trailer
Select a run group and get a car number.
Complete waiver and registration form.
Sign up for a work station
Technical Inspection:
Drive your car to the Tech Inspection Area (unless the Inspectors are coming car-to-car).
Give your Registration form to the Inspector
Your car will be inspected for safety
Car Number and Class will be put on window
Course Walk & Drivers Meeting:
Check the course map at trailer
Walk course with an experienced AutoCrosser
Check surface for rough spots, sand, bumps, oil, etc.
Study the course, look for: Turn in and apex points, braking points, entry point of slalom, etc.
At the Drivers Meeting
Check the course map at the timing trailer and attend the driver’s meeting where you will learn about the course:
Any recent changes to the course (unlikely, but happens)
Otherwise known as “walking the line” – Walk the course with an experienced AutoCrosser. Check for surface bumps, Loose Gravel and Stones, Uneven Pavement, Joints, etc. You will be given between 10 and 20 minutes to walk the course (usually in the morning before competition starts).
To ‘stay the course,’ you must first stay on course
The first problem that confronts every AutoCrosser is staying on course. So the first step is to learn where it goes. Study the course map, and then walk the course. If no map is provided, make your own. Walk the course at every opportunity…and take your time. Avoid following a crowd that blocks your view. Walk the line you plan to drive as if you were sitting in the driver’s seat.
Stop and study difficult or optional sections of the course to plan your line. Observe other drivers; note where they have difficulty — hitting pylons or staying on course. Move around the course to observe problem areas from different locations.
Having completed this step, decide how to go. How to go calls for a plan. And remember, an imperfect plan is always better than no plan at all. The question AutoCrossers most often ask is, “How do I determine the best line or path around the course?”
To begin with, concentrating only on determining the best line in AutoCrossing may be compared to slalom skiing. In an autocross, we are concerned with three things: time, distance and speed.
The formula time = distance / speed expresses the relationship of these three factors. We must determine how to drive the course in the least possible time. In order to do this, the path chosen should offer the shortest distance and permit the greatest speed. As the formula illustrates, time can be made smaller by either decreasing the distance or increasing the speed…or better yet, both. Many times it becomes impossible to drive at the highest speed over the shortest distance. When this occurs, the best path is a compromise somewhere between the two extremes.
Sample Classing System
Stock – Cars must have been series produced with normal road touring equipment capable of being licensed for normal road use in the United States, and normally sold and delivered through manufacturer’s retail sales outlets in the United States.
Some allowable modifications:
Accessories, gauges, indicators, lights and other appearance modifications which have no effect on performance and/or handling and do not materially reduce the weight of the car are permitted.
Alternate steering wheels are allowed provided the outside diameter is not changed by more than one inch from the standard size.
Any tire which is O.E.M. on a car eligible for Stock Category may be used. Non allowable tires are: any tire with a tread wear less than 200.
Any type of wheel may be used provided: It is the same width and diameter as stock and it does not have an offset more than +/- .25 inch from the standard wheel for the car. Wheel spacers are not allowed
Any shock absorber may be substituted provided the number, type, system of attachment points are not altered. Suspension geometry and range travel may not be altered.
Substitution, addition or removal of any front anti-roll bars is permitted
The make of spark plugs, points ignition, coil, and high tension wires is free.
Air filters may be removed, however, no other components of the air induction system may be removed, replaced, or modified.
Street Prepared
Equipment and/or modifications may be exchanged between different years and models of a vehicle if the item is standard on the year/model from which it was taken. The updated/backdated part of the part to which it is to be attached may not be altered, modified, machined or otherwise changed to facilitate the updating/backdating allowance. The updating/ backdating of engines, transmissions or trans-axles must be done as a unit, component parts of these units may not be interchanged.
Fenders and bumpers may be modified for tire clearance
Any fully padded and upholstered front seat may be used
Any steering wheel may be used
Aerodynamic devices are permitted, however, wings are not allowed.
Wheels of any diameter, width, or offset may be used.
Shock absorber bump stops may be altered or removed.
Any anti-sway bar is permitted.
Suspension bushings may be replaced with bushings of any material (except metal) as long as they fit in the original location.
Relocation of battery or batteries is permitted.
Carbs., fuel injection, intercoolers and intake manifolds are unrestricted. Turbos may not be changed or modified.
Limited Slip differentials are permitted.
Prepared
Removal of glass and/or headlight, front parking or front signal light assemblies, lenses and bulbs is not required. Operating tail/stop lights are required.
Mirrors are not required
Grills may be removed
Any fuel tank may be used
Passenger seats are not required
Driver and Passenger door glass may be removed
Floor covering and all interior trim may be removed
Component parts of the body may be lightened or replaced by ones of alternative materials.
Roll bars and roll cages may be added.
Modified
Interiors may be gutted
Suspension systems and wheels are free
Windscreen, side mirrors and tail/stop lights are not required.
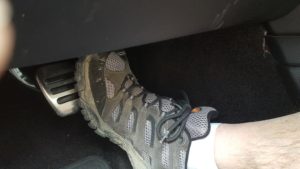
Proper Seating Positions
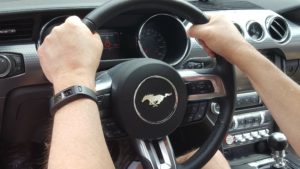
Adjust the driver’s seat so that your elbows are slightly bent while your hands are on the steering wheel either at the 10 and 2 o’clock position or the 9 and 3 o’clock position. Now your leg position should be adjusted so that your legs stay slightly bent even when you operate the clutch and/or the brake pedal. You do not want to over-extend or straighten your legs when you operate the various pedals. The seat back (rake) should be adjusted so that you can put the bottom of your wrists on the top of the steering wheel without stretching to do so.NOTE: Because of your body structure or that you are very tall, you may have to compromise your position to allow you to sit in the seat with your helmet on and not hit your head on the roof/headliner of your car. If anything adjust the rake of the seat more so than the leg position.
If possible, obtain and use a four or five point harness. If using your standard shoulder/lap belt, try and adjust it tight enough so that you will not move around in your seat. This will enable you to concentrate more on your driving and less on trying to stay in your seat. Upgrading your standard belts with CGlocks are an excellent upgrade to help keep you planted in your seat.
Adjust your left side view mirror and your rear view mirror so that you can see that traffic that may come up behind you. Your instructor should adjust the right side view mirror for his view so that he can also watch oncoming traffic. Note: some AutoCrosses can and/or will have multiple cars running in a staggered pattern (aka “Dual Timing”).
Try and keep your head as erect as possible, that is, in the same plane as the car is in. Leaning your head into the turn will not make the car handle any better. What will happen is that you will receive a distorted view and distorted inputs through your eyes to your brain, thus in turn affecting your driving skills.
Steering Techniques
Keep both hands on the steering wheel at all times, except at the start and shifting.
Position your hands on the steering wheel at either the 10 and 2 o’clock positions or 9 and 3 o’clock positions on the wheel.
For most of your steering inputs, you will not have to adjust your hand positions. However on some courses that have very tight turns you may want to use is known as “Shuffle Steering.” – This will enable you to feed the wheel from hand to hand without taking either hand off of the steering wheel. First imagine that there is a vertical line through the steering wheel at 12 and 6 o’clock. The left hand stays on the left side of the wheel and the right hand stays on the right side. To turn right, slide the right hand up to the top of the steering wheel at 12 o’clock then pull the wheel down to the 6 o’clock position, meeting the right hand with the left hand which has slid around the steering wheel to that position. To continue to turn the wheel, the left hand will now pull the wheel to the 12 o’clock position, and so on. To turn left, the left hand begins the process by starting to pull the wheel from the 12 o’clock position down the left side to the 6 o’clock position where the right hand will meet it and continue the arc to the left.Remember: you use this process to turn into a corner and to turn out of the corner, so you turn in and you turn out. Don’t let the steering wheel loose in your hands when coming out of a turn then grab it when you think it is straight. You will only be playing a guessing game. Steer in, steer out. Also, most of the movement that you will do with this method will go beyond the 9 and 3 o’clock positions on the steering wheel. The more you practice this method, the easier it will work, eventually it will be an automatic process. As you exercise the procedure, you will appear to be moving the wheel slowly, but deliberately. Slow down and you will go faster!
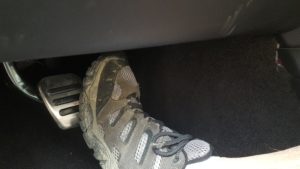
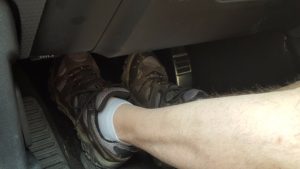
Heel ‘n’ Toe
This is what you need to use to make smooth shift changes when going from a higher gear to a lower gear and at the same time braking. The first question you may ask is, “There are three pedals, but I only have two feet?” With this technique, which you will use at the end of the brake zone, will enable you to continue your braking and to “blip” the accelerator (throttle) to get your engine’s RPM’s up for that SMOOTH shift when you let out the clutch and engage to accelerate through the apex and out of the turn.
There are three basic positions to accomplish this task:
Ball of the right foot on the brake, heel on the bottom or middle of the accelerator
Ball of the right foot on the accelerator, heel on the brake.
The left side of the right foot on the brake, and the right side of the same foot on the accelerator — rolling the foot to the right side to blip the accelerator.
There is no set position that is most correct, which one works is the one that works the easiest and the best for you. And also depends upon your pedal cluster and how you can angle your feet.
Lets work through the process: You are accelerating down a long straight on the course and will be approaching a turn. To proceed through the turn properly, you will need to be in a lower gear. As you approach the turn, you brake. As you near the end of the brake zone, while still maintaining the braking of the car, you push in the clutch with your left foot, then move your right foot to blip the accelerator while you are still continuing the braking procedure. Now with the clutch still in, you shift from the higher gear to the lower gear, then let out the clutch, at the same time, bliping the throttle several times to maintain the higher engine RPM. As the clutch is engaged and the engine’s RPM’s meet the transmission RPM’s this shift procedure will be smooth. This will eliminate the jolts you may have felt in the past when the clutch was engaged. It keeps the attitude of the vehicle stable, the suspension stable, and your driving line SMOOTH.
Remember, this is a technique that should be practiced at slow speeds, in a parking lot, etc., until you have the routine down smoothly and you do not have to concentrate on working it. It is an important technique which you will use whether you are driving on the road course, AutoCrossing or just everyday street driving.
Once the Event starts
Watch other drivers: What line are they driving? Where are the breaking points? Where are the shifting points? — (Up and Down)
Now it’s your turn:
Bring your car to staging area
Proceed to start line
Check your seat belt
Make sure all loose objects are out of the car
Turn the rear view mirror away from view
Focus your thoughts on how you want to drive & the course
Starter gives the OK!
Start sharp, but don’t spin tires
Look ahead at gates & know where you want to be
Remember when to brake and shift
If you should spin
BOTH FEET IN!
Hands at 3 & 9 on steering wheel
Look for corner workers to re-start you
Finish the course
If you see a Red Flag or hear a loud horn:
Quickly come to a Complete Stop
Look for corner workers to re-start you
Drive the First Run at Reduced Throttle
Learn to stay on course
Drive a good line
Drive S M O O T H L Y
HAVE A GOOD TIME !!!!
Tips & Guidelines
General Rules
A car is most stable under acceleration
Never brake in a corner!
Enter slow, exit fast
Use a consistent, comfortable braking point
Maximize exit speed by getting on the power sooner, before increasing entry speed into the corner.
The Line
The line is the route around a course and through its corners which will enable the car to go fastest.
In a corner, it’s the broadest arc that maximizes speed, given “g” as a constant in V(2) = 15 gr
The “line” and the goemetry of the edges of the pavement are usually different.
There is only one “line”
Different cars require different approaches to stay on the “line”
The most important corners are those leading to the longest straights.
Concept of Apex: The Geometric Apex is at the point where the bisection of the angle of the tangent lines drawn from the turn entry and turn exit crosses the inside edge of the track. The Driven Apex is the point on the inside of the track that the driver chooses (hopefully intentionally) to divide the turn. If before the Geometric Apex, it is termed an Early Apex. If after the Geometric Apex, it is termed a Late Apex. In general: “Late Apex = Safe Apex.”
Vision
Eyes up — don’t drive off the nose of the car.
Where you’re looking is where you’re going
Look through a corner and beyond, expand your field of vision.
When exiting a corner look ahead for: 1. Flag Station and Corner Workers 2. Traffic – all around 3. Mirrors, gauges, etc.
Do not follow blindly
Do not fix in on the cones
Vision is the most important element of High Performance Driving
Tires
Consider “Chalking Your Tires” – Chalking tires is an AutoCross technique designed to give you base level information about the over/under and just right inflation of your tires without spending a lot of money on expensive tire monitors and pyrometers. The goal of chalking tires is to find the right tire pressure to maximize tire grip.
Over inflated tires lead to sliding and loss of traction while cornering. Under inflation leads to poor handling qualities. During a typical AutoCross run, tire temperatures increase much more than street driving. The increase in temperature leads to an increase in air pressure in the tires. Recommended tire pressures are posted on a placard visible when the driver’s door is open. For a beginner, the placard recommended pressures are a good starting point. If your Student has their tires inflated to the recommended pressure at the beginning of the session, the tires will heat and be in an overpressure situation during the session. Typical pressure increases can range between 2 to 12 psi depending on the type of tire, outside air temperature and other factors.
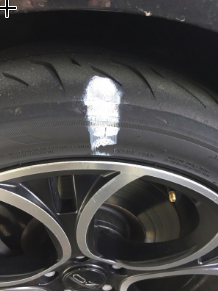
You can use sidewalk chalk purchased from the toy department of grocery stores or department stores or white shoe polish (preferable water soluble).
The mark should start from the sidewall and continue around the shoulder toward the center of the tire to where the tread flattens out (see Example below). The front tires will experience more heating than the rear tires, so chalk at least one front and one rear tire. For consistency, chalk each tire with three marks separated by 120 degrees (or at the 12, 4 and 8 o’clock positions on the clock face).
Example: Chalking the tire across the shoulder/sidewall of the tire
Determining the proper amount of rollover… try and use this technique with your tires to aid your driving and also rule out any possible handling issues due to poorly or improperly inflated tires. Note: In the rain add about 2 pounds more pressure to each tire
Gates & Obstacles – Understanding the Course Map
Start Gate
Line up on start line as directed
Start when ready after starter’s signal
Break timing beam at highest attainable speed.
Box
Boxes are usually driven through at least twice.
The course line crosses within the box.
Decision Gate
Locate decision gates and memorize sequence of direction changes when passing through gate, ie: 1st time, turn left, 2nd time right, etc.
Decision gate sequence can be in any order or combination of that shown above.
Offset Gates
Smooth control inputs
Maintain flowing line without abrupt changes.
Even Slaloms
Constant speed, smooth steering inputs. Entry and Exit on the opposite side.
Odd Slaloms
Constant speed, smooth steering inputs. Entry and Exit on the same side.
Expanding Slaloms
Increase speed, smooth steering and acceleration.
Decreasing Slaloms
Decrease speed, smooth steering and braking.
Optional Slaloms
Enter on either side
Mandatory Slaloms
Enter side opposite the arrow
Stop Garage
Come to a complete stop in the stop garage
Hitting large center (end) cone disqualifies run.
Suspension Do’s and Don’ts
Suspension Component
Causes Oversteer
Causes Understeer
Front Spring Rate
Lighter (smaller dia.) torsion bars or spring wire dia.
Heavier (larger dia.) torsion bars or spring wire dia.
Rear Spring Rate
Heavier (larger dia.) torsion bars or spring wire dia.
Lighter (smaller dia.) torsion bars or spring wire dia.
Front sway bar
Lighter or adjust to lengthen arm
Thicker or adjust to shorten arm
Rear sway bar
Heavier or adjust to shorten arm
Thinner or adjust to lengthen arm
Weight distribution
More rearward
More forward
Front Shock Absorber
softer
harder
Rear Shock Absorber
harder
softer
Front camber
more negative
more positive
Rear camber
more positive
more negative
Front tire width
larger
smaller
Rear tire width
smaller
larger
Front tire pressure
lower
higher
Rear tire pressure
lower
higher
Front track
wider
narrower
Rear track
narrower
wider
Front spoiler
larger
smaller
Rear Spoiler
smaller or less angle
larger or more angle
Glossary of Terms
To help clarify the information you’ve just read please be sure to check out our Glossary of Racing Terms.